Troubleshooting: Injection Molding Seven Steps Toward Scientific Troubleshooting
A scientific troubleshooter is not someone who pushes buttons faster or has more tricks up his or her sleeve.
All troubleshooters must document the process. A trail of documentation, beginning when the process was established and approved, that continues to build as the process is adjusted, creates a portfolio of information to draw upon when trouble arises.
With accurate knowledge about which processing parameters have changed, the scientific troubleshooter can begin to make changes to return the process outputs to the documented standard.
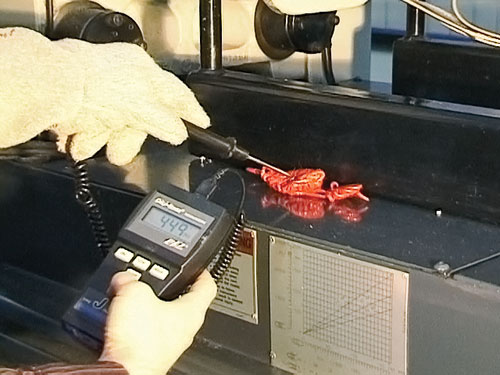
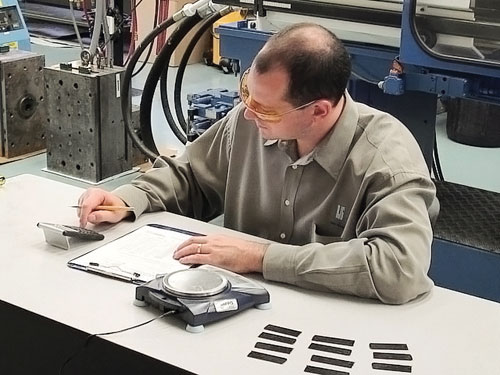
The scientific troubleshooter documents the process outputs, such as melt temperature, when acceptable parts are produced.

A scientific troubleshooter is not someone who pushes buttons faster or has more tricks up his or her sleeve. Rather, a scientific troubleshooter knows the history of a properly documented process, makes each adjustment based on knowledge, and verifies and documents the result of each change.
Good troubleshooting does not begin when a non-conformance occurs. It starts prior to first-piece-approval. If you are more of a traditional troubleshooter—one who has little use for process documentation, makes adjustments based on learned behavior, and does not verify the effectiveness of each change—you might want to adjust your approach. Here are seven steps to get you going:
STEP 1—SCIENTIFIC MOLDING
Merriam-Webster defines science as “the state of knowing.” The purpose of establishing a scientific process is to create the most stable and reliable process possible, based on good fundamental knowledge of the mold, machine, material, and process.
You are likely familiar by now with terms such as “Decoupled Molding,” “Intelligent Molding,” or “Scientific Molding.” To demystify these terms: Each methodology applies to a process that separates first-stage filling from second-stage packing by using a short-shot during injection. In each case, the intent is to build a strong, reliable process that best compensates for the inherent variability of plastics and thus reduces the overall need for troubleshooting. Although there are many factors that contribute to a good process, these attributes are most common:
- Filling: First-stage fill uses velocity control to inject with as few velocity steps as possible. There must be adequate maximum pressure to avoid a pressure-limited process. First-to-second stage transfer should take place using screw position. The part should have a visible short shot at this time.
- Packing: Second-stage packing pressure should be high enough to finish filling the mold cavity and compensate for material shrinkage during cooling. This pressure is traditionally 50% to 75% of the pressure used during the first stage, though it can drop as low as 25% for some thick parts and may exceed 100% for many thin-walled parts. Second-stage packing time should be determined by graphing part weight versus second-stage time. The optimal second stage time is the time at which the part weight does not increase with an increase in second-stage time.
- Recovery: Screw delay or decompression must be used prior to screw recovery to relieve the packing pressure. Screw recovery should take approximately 80% of the cooling time. Screw decompression must be used after recovery whenever a check ring is used. For most screws, the optimal amount of decompression is equal to the check-ring travel.
STEP 2—DOCUMENT PROCESS OUTPUTS
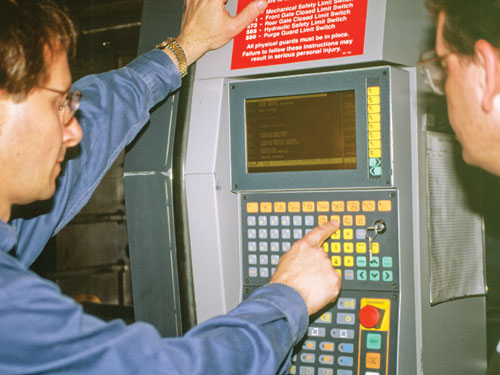
The traditional troubleshooter documents the process inputs, which are machine-specific parameters that are entered into the machine. The scientific troubleshooter documents the process outputs, which are the results of the process when acceptable parts are produced. Many of these parameters are the same as the process input, but each of these parameters would be consistent from one machine to another.
Examples of machine-independent process parameters include melt temperature, coolant temperature entering and leaving the mold, coolant flow, first-stage fill time, first-stage fill weight, second-stage packing time, second-stage plastic pressure, gate-seal time, cooling time, plastic backpressure, screw recovery time, overall cycle time, final part weight, clamp tonnage, and dewpoint. You can also document any important information such as photographs, observations, and quality information.
STEP 3—RULE OUT OBVIOUS CAUSES
Once a non-conformance occurs, the first thing to do is to thoroughly inspect the part to make sure that other defects are not present. If any aspect of the process, mold, machine, or material is obviously suspect, then this should be investigated first.
For example, let’s suppose a part may have flash. With only this information, the traditional troubleshooter might investigate the clamp tonnage, transfer position, packing pressure, or barrel temperatures. Now, let’s assume further inspection by the scientific troubleshooter, which determines that the part also has splay. With this additional information, it may be possible to suppose that both the flash and splay could be the result of moisture in the material.
STEP 4—ACTUAL VS. ‘IDEAL’ PROCESSES
Once obvious causes are ruled out, the next logical step is to compare the current process with the documented standard. Since a well-documented process contains a variety of parameters, it is best to start by reviewing the parameters that most likely relate to your defect. As you compare the documented standard to the current process, you will determine which aspects of the process have deviated from the standard. A scientific troubleshooter can use this information to help make educated decisions about what parameters need to be changed to bring the process back to the documented standard.
For example, if the part is showing material degradation, you should first compare actual vs. documented parameters such as melt temperature, backpressure, and first-stage injection time. Likewise, if flash, short shots, or sinks are present, it is best to turn off second-stage packing to verify all the process outputs related to injection such as first-stage fill time, first- stage fill weight, and plastic pressure at transfer from first to second stage.
STEP 5—RETURN TO STANDARD PROCESS
With accurate knowledge about which processing parameters have changed, the scientific troubleshooter can begin to make changes to return the process outputs to the documented standard. Always be careful of related process parameters. For example, if the first-stage fill time is too high and the first-stage fill weight is too low, then an increase in the injection speed may bring both parameters back to the documented standard.
The goal here is not to just fix the defect, but to return the machine-independent process outputs back to the documented standard. When steps 1 and 2 are conducted properly, the scientific troubleshooter has confidence that the parts will be acceptable when the process is returned to the documented standard, if the mold, machine, and material are behaving properly. This troubleshooting method will also help the scientific troubleshooter to quickly identify and isolate a problem with the equipment or material.
STEP 6—VERIFY THE PART & PROCESS
After the parts are brought into conformance, it is best to ensure that the part and process conform to the standard. This means the scientific troubleshooter should take a few minutes to check each of the parameters that are easy to verify. It may be impractical to check every process output, but any information that is easily obtained, such as first-stage fill time, first-stage fill weight, cycle time, and cooling time, will help increase the confidence that the process will remain stable and reliable over time.
STEP 7—DOCUMENT ALL CHANGES
This is one step any troubleshooter—scientific or traditional—should take. A trail of documentation, beginning when the process was established and approved, that continues to build as the process is adjusted, creates a portfolio of information to draw upon when trouble arises. A scientific troubleshooter should be able to see the full history of the process, machine, and mold. For example, if an employee on the first shift corrected the process by increasing transfer position, this would be invaluable information for the second-shift technician who encounters a defective part such as a sink.
If a systematic approach to processing and documentation is used when the process is established, a scientific troubleshooter will be able to correct the problem in a relatively short time with a significantly high degree of confidence. Ultimately, good troubleshooting is just an extension of good processing. The more effectively your technicians and engineers process and document what they do, the more efficiently they will troubleshoot when non-conformances occur.
About the Author
Andy Routsis started out on the production floor and is currently a hands-on engineer, trainer, and adjunct professor at the University of Mass. Lowell, Dept. of Engineering. He runs A. Routsis Associates, Inc. in Dracut, Mass., which offers an array of training programs and services for processors. (978) 957-0700; e-mail info@traininteractive.com.


Related Content

How to Optimize Pack & Hold Times for Hot-Runner & Valve-Gated Molds
Applying a scientific method to what is typically a trial-and-error process. Part 2 of 2.
Read More
What to Look for in High-Speed Automation for Pipette Production
Automation is a must-have for molders of pipettes. Make sure your supplier provides assurances of throughput and output, manpower utilization, floor space consumption and payback period.
Read More
Got Streaks or Black Specs? Here’s How to Find and Fix Them
Determining the source of streaking or contamination in your molded parts is a critical step in perfecting your purging procedures ultimately saving you time and money.
Read More
How to Reduce Sinks in Injection Molding
Modifications to the common core pin can be a simple solution, but don’t expect all resins to behave the same. Gas assist is also worth a try.
Read MoreRead Next

See Recyclers Close the Loop on Trade Show Production Scrap at NPE2024
A collaboration between show organizer PLASTICS, recycler CPR and size reduction experts WEIMA and Conair recovered and recycled all production scrap at NPE2024.
Read More
Beyond Prototypes: 8 Ways the Plastics Industry Is Using 3D Printing
Plastics processors are finding applications for 3D printing around the plant and across the supply chain. Here are 8 examples to look for at NPE2024.
Read More