


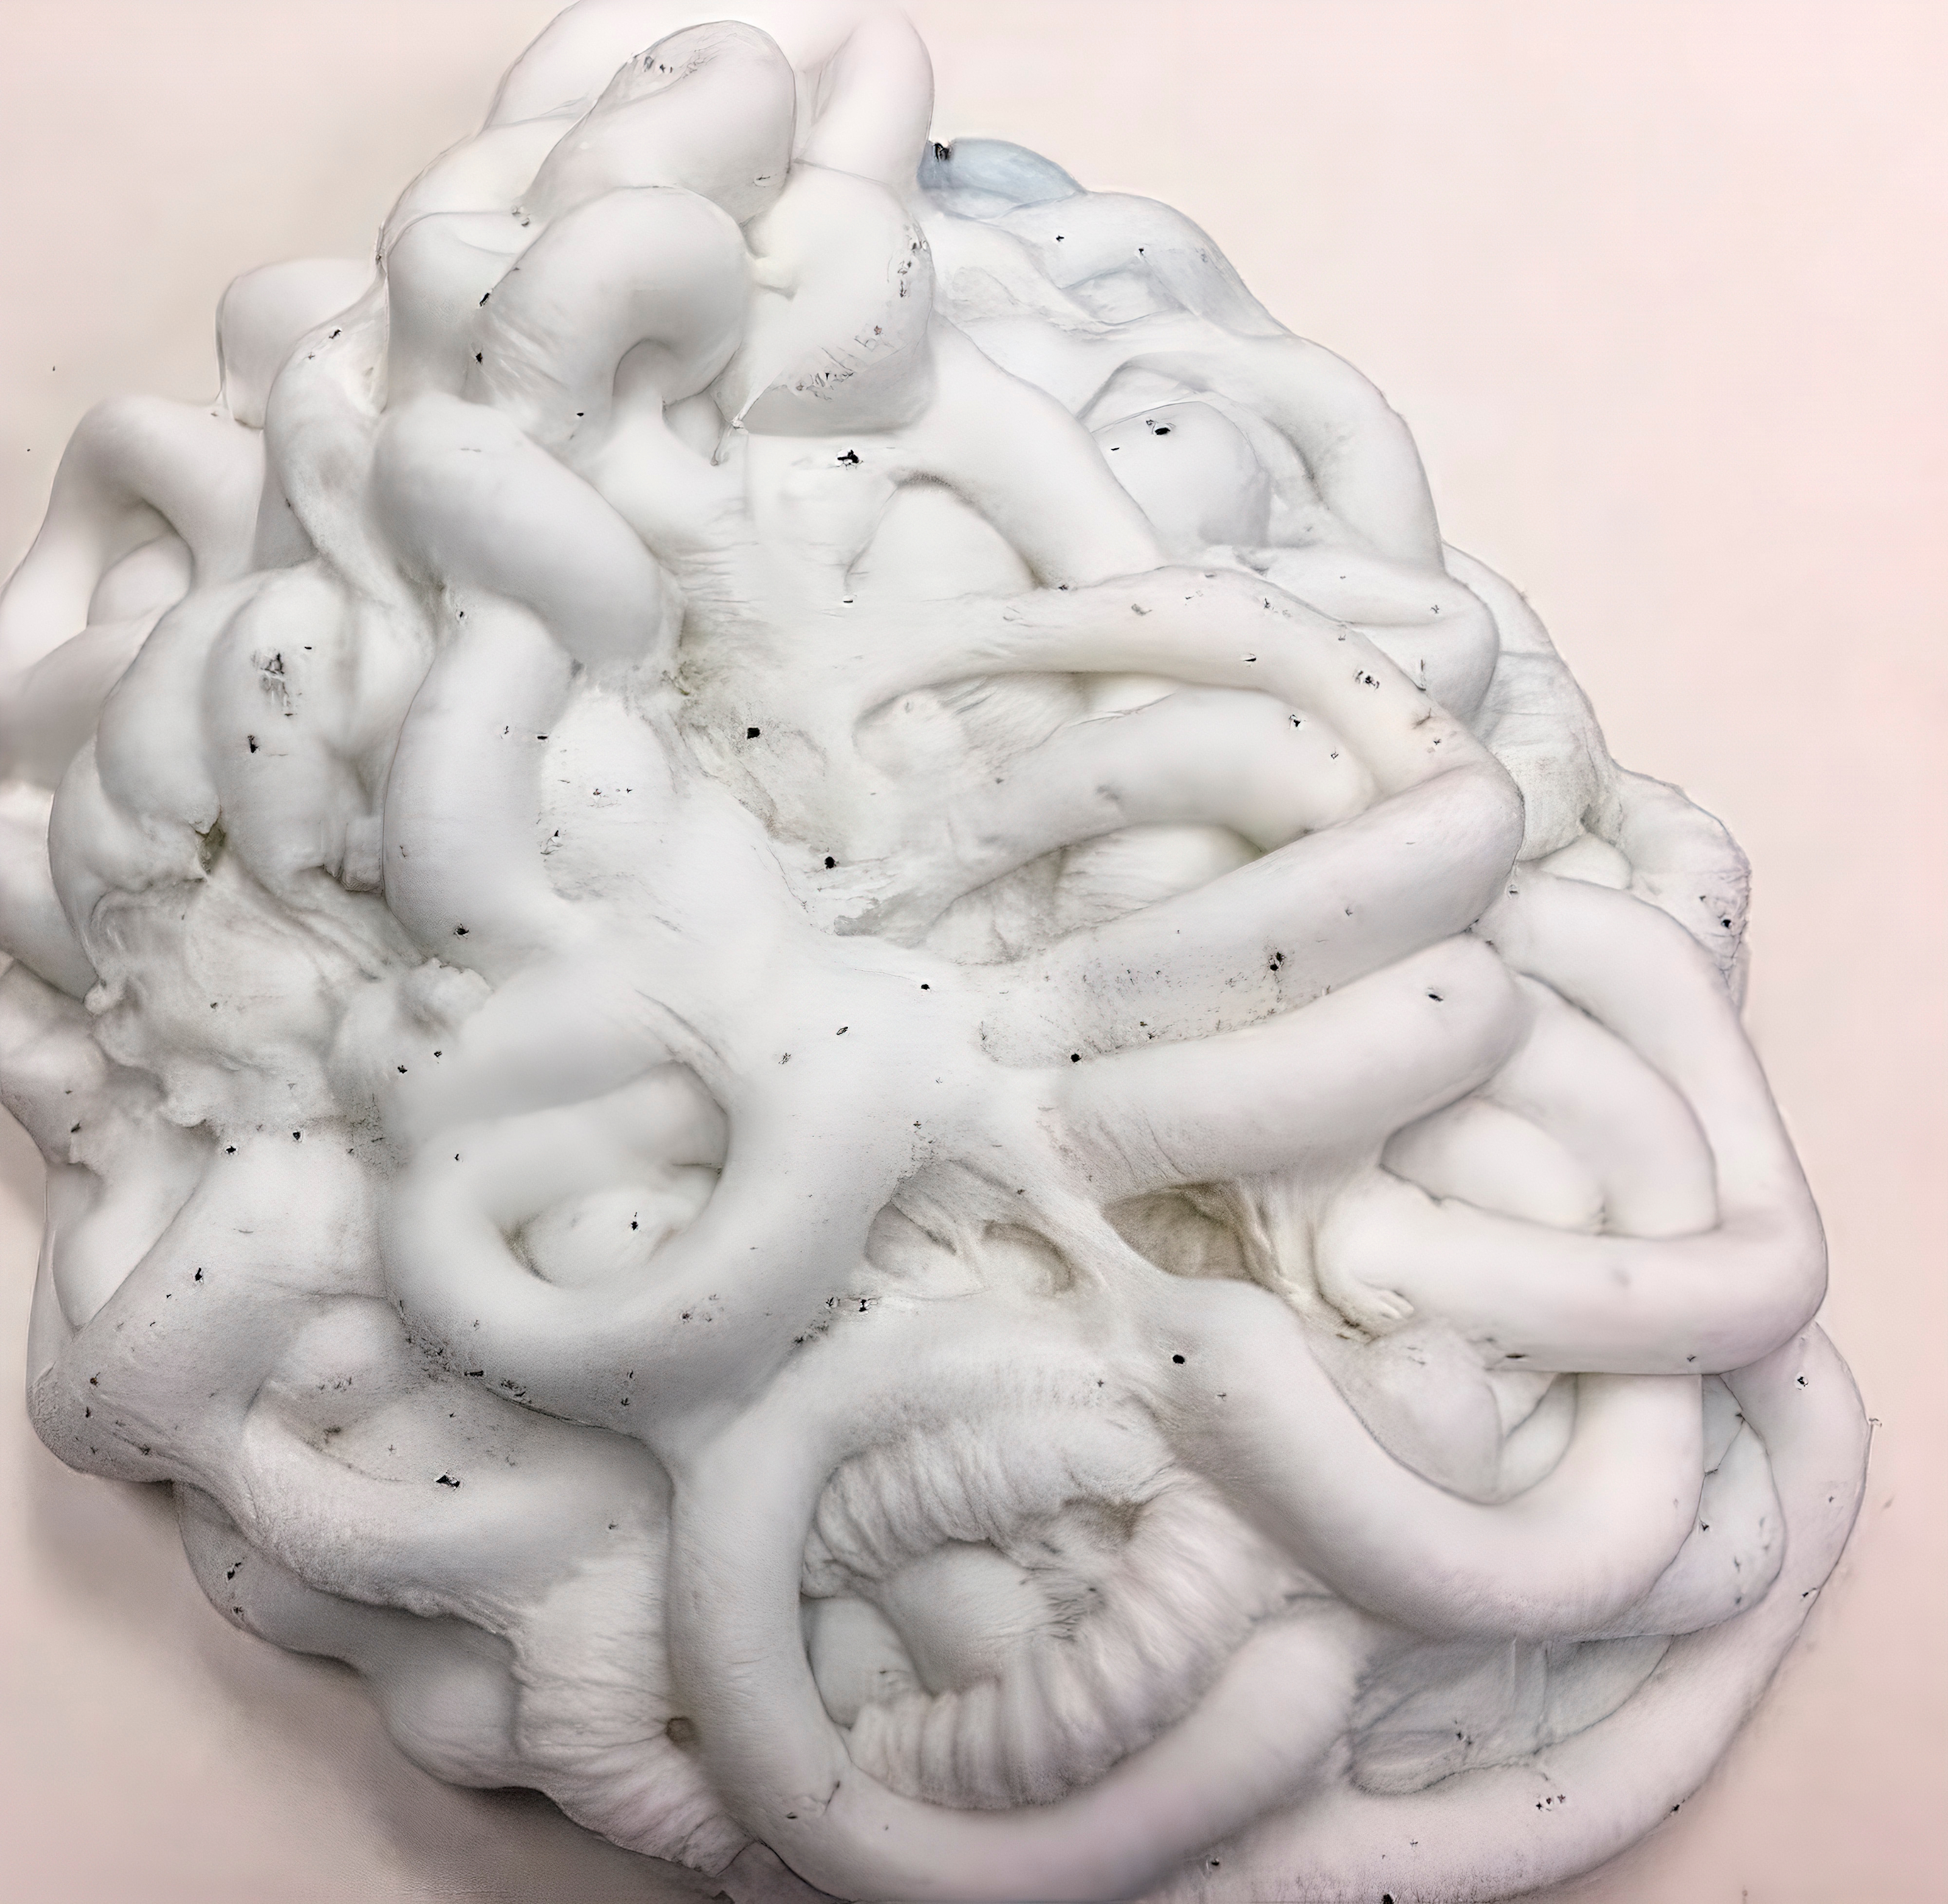
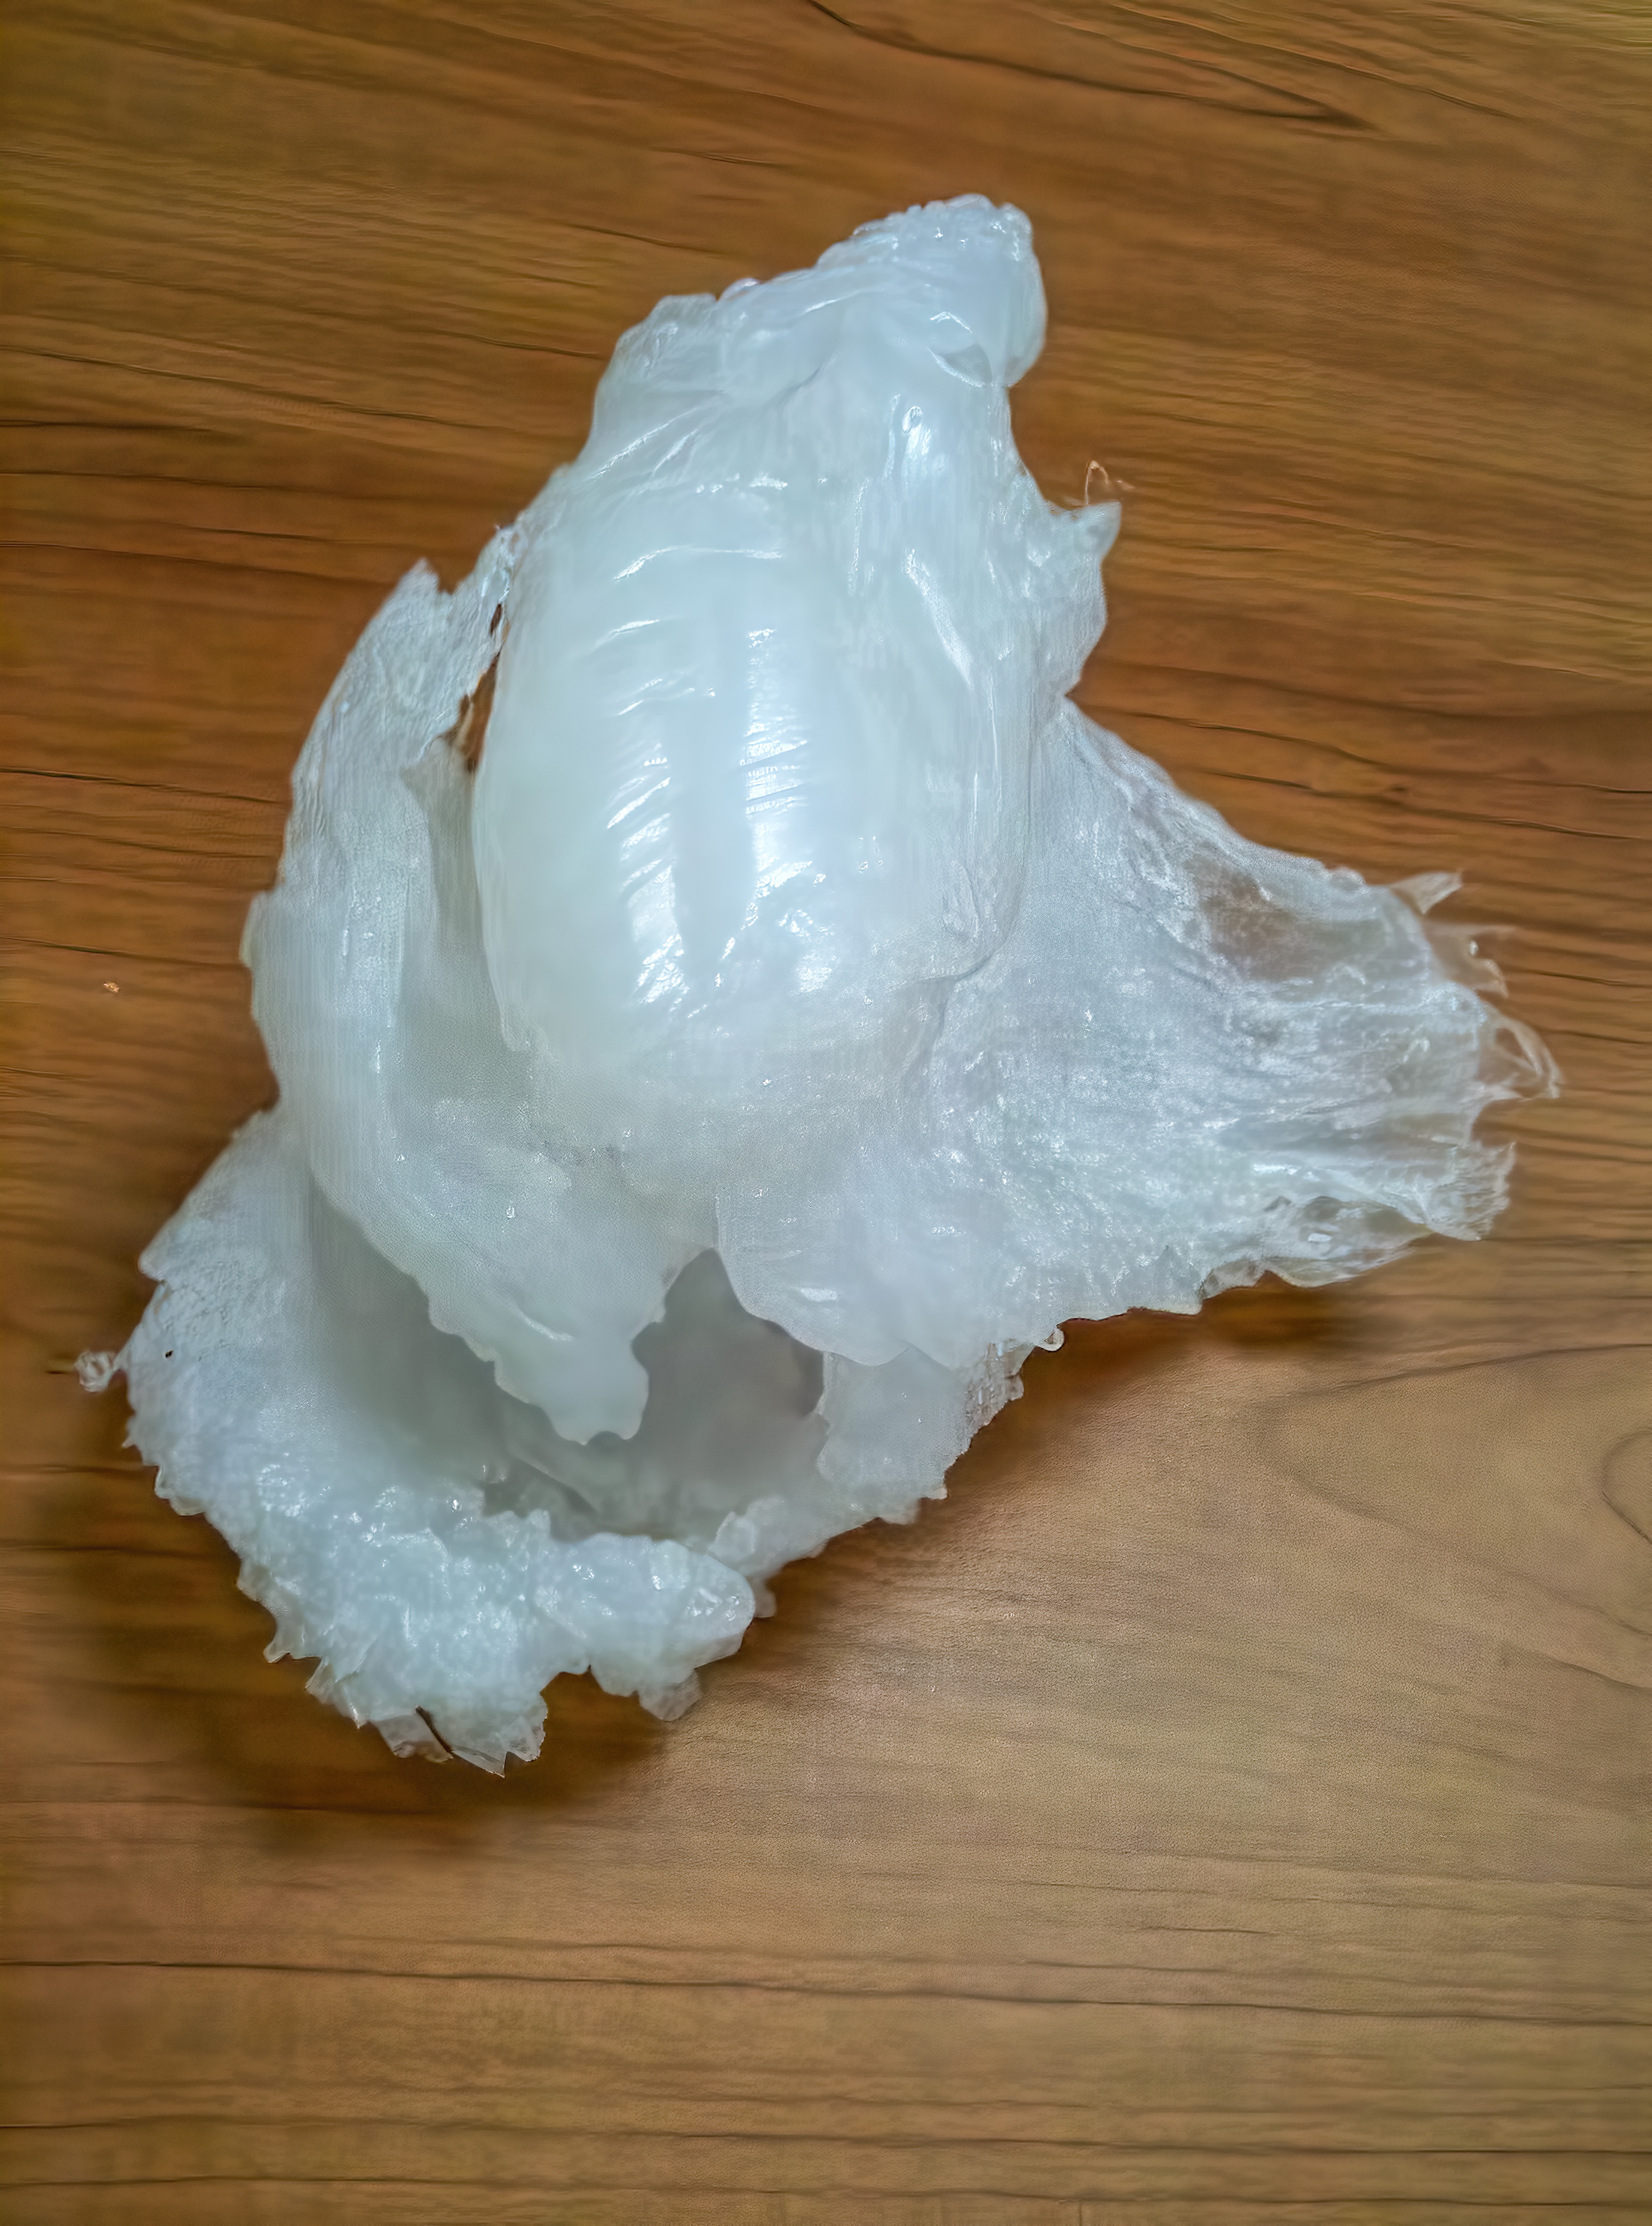
Examine your purge pile for specks and uneven color distribution. If there are random specks in the pile as shown here, then your streaks are likely being caused by the screw and barrel. Photos: Dyna-Purge
Part contamination in the form of streaking and/or black specks is a common problem in injection molding. Once the you find contamination, the next task is to determine the source of the problem. In this article we will address how to locate the problem area and then provide some purging procedures to deal with specific areas of concern. This will streamline the purging process and allow you to utilize your purging compound in the most cost-effective manner.
Determining the Source
If the streak or contamination shows up randomly, it’s likely to be in the barrel or feed system. Color or degraded resin may be trapped in a negative-flow area. There may not be enough physical turbulence in the area to move all of the contamination, and the next material only picks up trace amounts that show up intermittently.


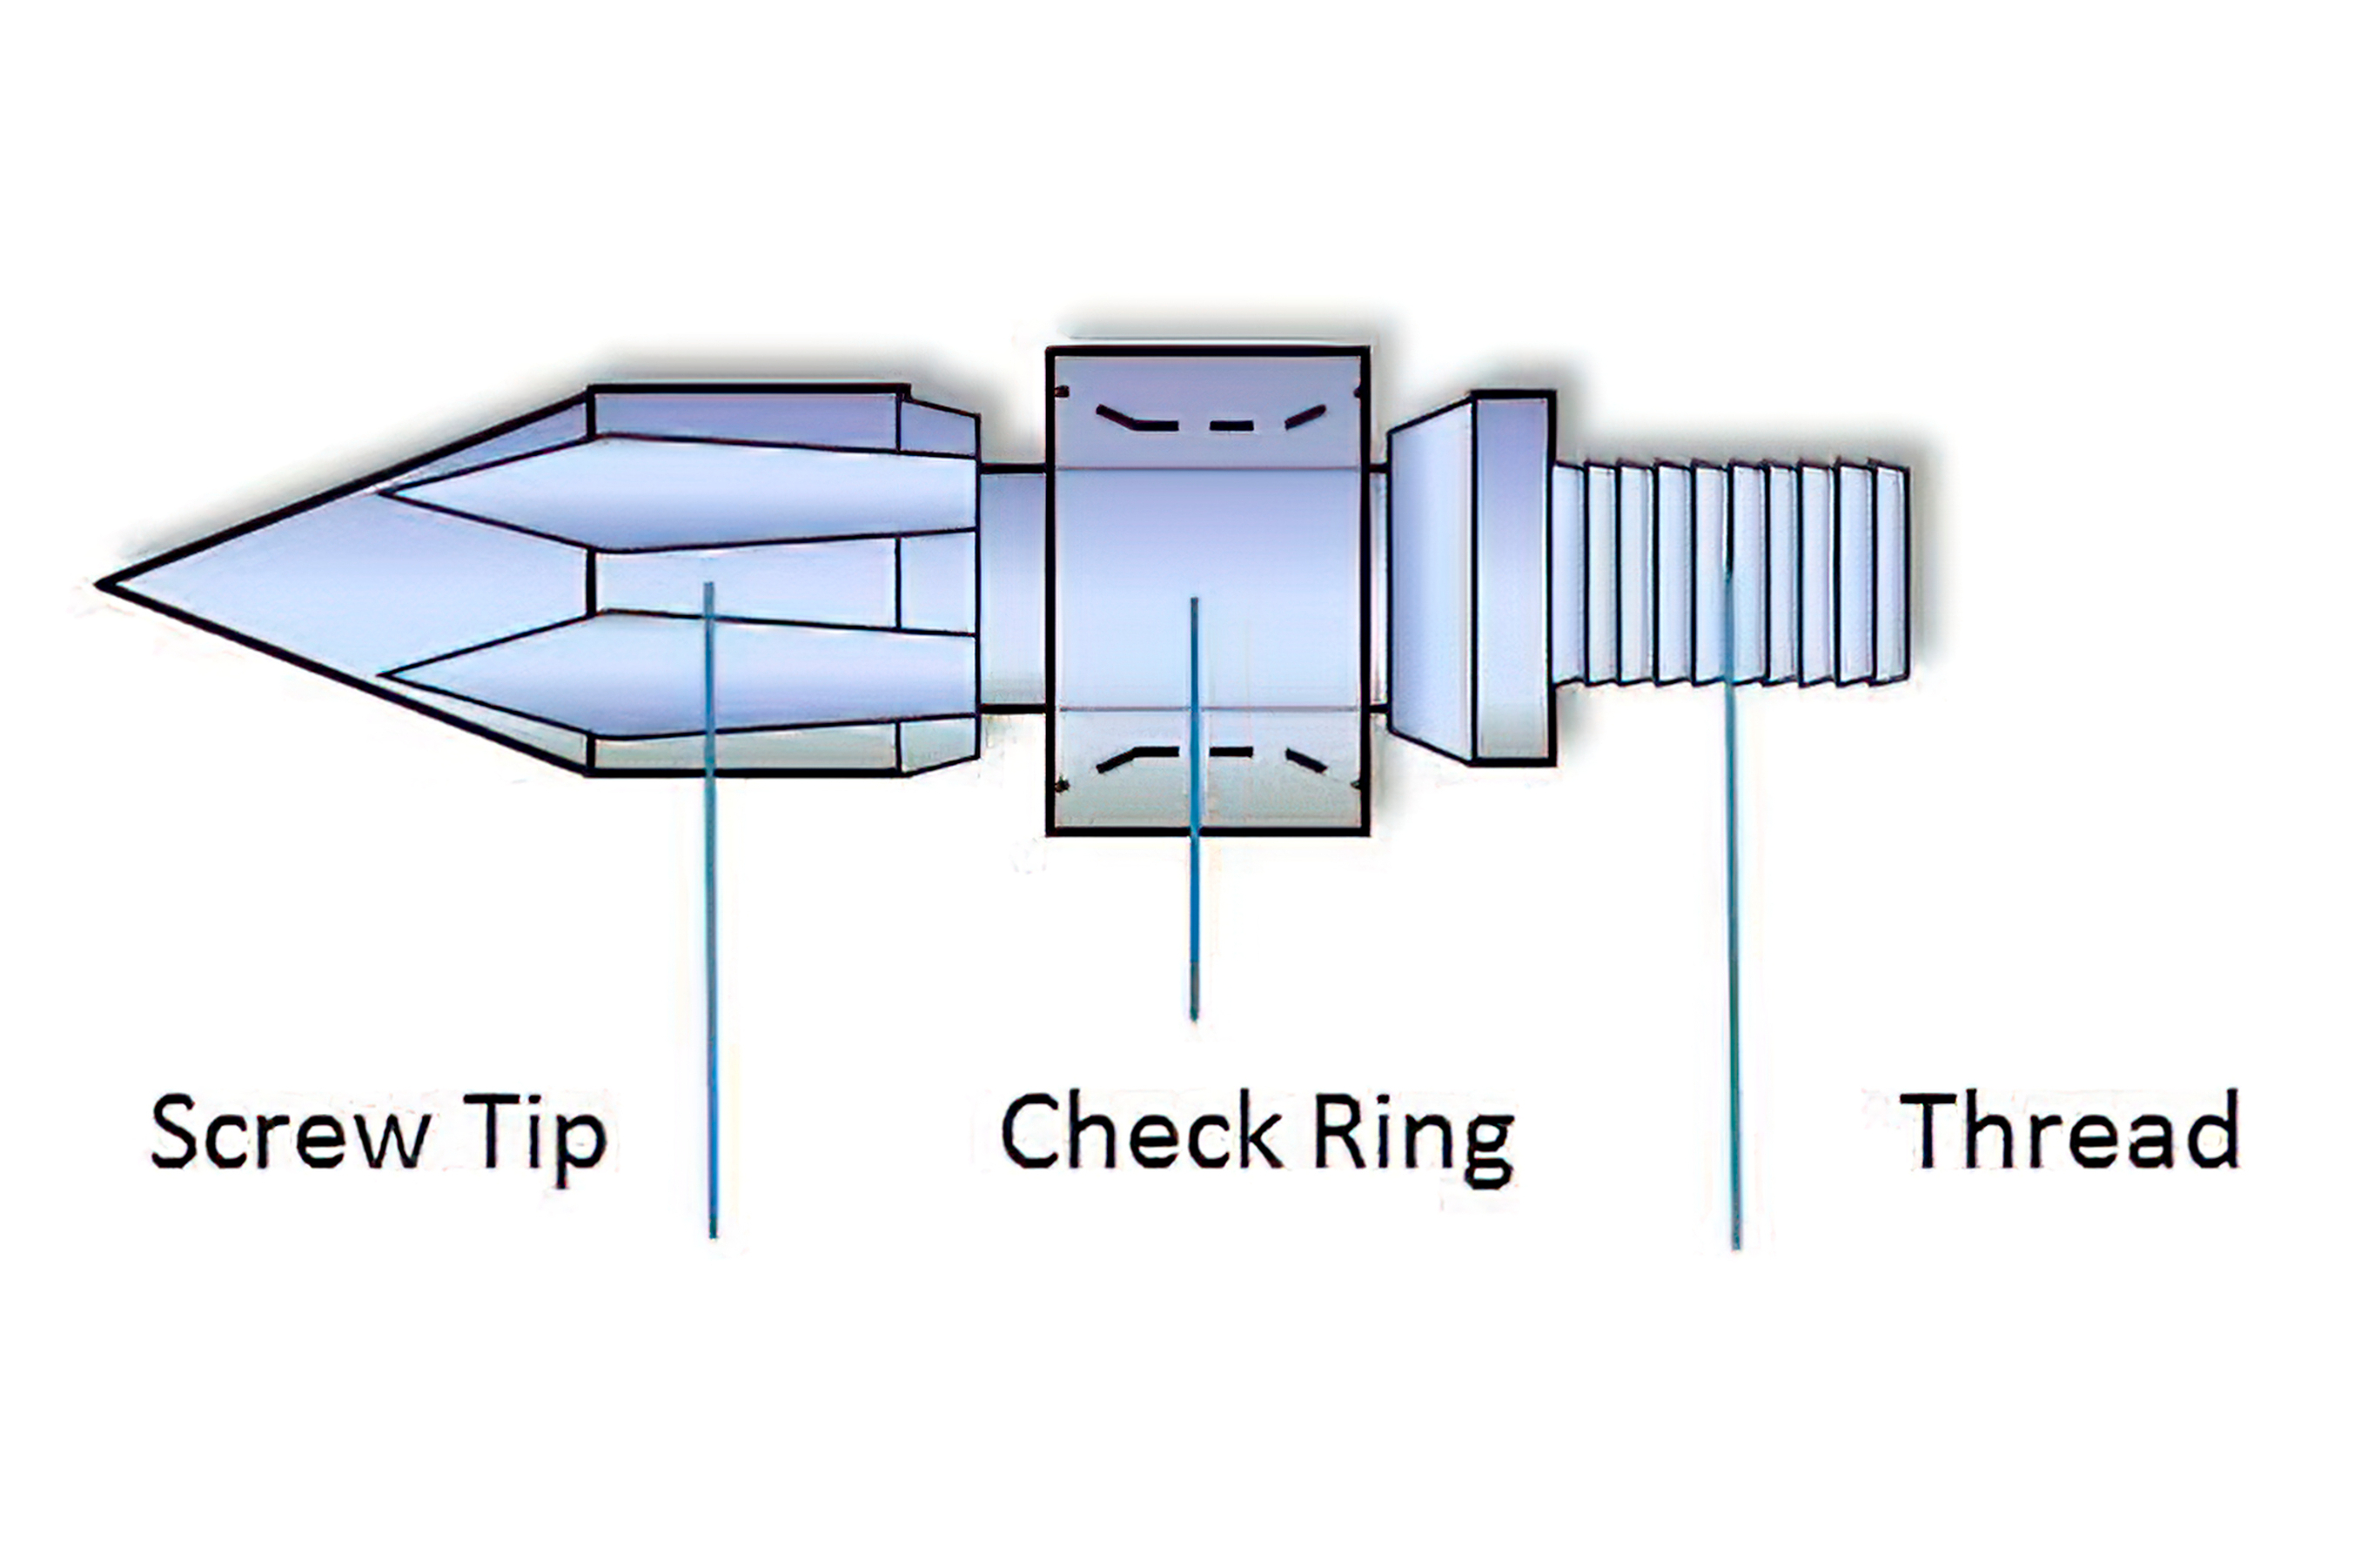
If your specks are in the check ring, run several short, high-velocity shots. This should help dislodge them and eliminate buildup around the check ring.
At this point, don’t discount resin issues. Examine your resin for specking and be sure that the drying system is working reliably. Dirty filters in a feed system can wreak havoc. Regrind—if used—is another possible culprit, caused by poorly cleaned grinders, fines, and dust. If it is not in the feedstock, then it may be in the barrel. Long residence times can lead to degradation and cause black specks. Remember this rule of thumb: Use 25% to 65% of the barrel capacity when choosing the best-sized machine for your job. Oil seeping into the barrel on older machines—from seal failure—is another possible culprit.
If the contamination shows up at the same spot every time, it’s likely to be entrapped in the nozzle, hot runner, or barrel.
To determine if the barrel is the issue, run shots of purge compound though the barrel. Be sure that the barrel is completely full to ensure that any material left behind in a dead spot is also being picked up. Examine the purge pile for specks and uneven color distribution. If there are random specks or streaks in the pile, then your problem likely lies with the screw and barrel.
If the contamination shows up at the same spot every time, it’s likely to be entrapped in the nozzle, hot runner, or barrel. If the purge from the barrel shows a continuous streak in the same spot close to the gate, then the contamination is likely in the nozzle, check valve, or hot runner. If you have determined that the contamination is not in the barrel, then run purge shots through the hot runner to determine whether the contamination is downstream in the manifold or gates. One or more gates may be more problematic than others due to an uneven flow pattern in the manifold, so examine each purge pile individually. Be sure to check with your purging compound supplier first to determine whether the purge compound is suited for hot runners.
Mixing nozzles and color-dispersion discs are extremely difficult to purge. They are notorious for cracking, which allows color and carbon buildup. Due to the non-Newtonian flow of plastics, a color streak will follow the flow pattern and deposit itself in the same place. Knowing this, the farther from the gate the consistent color streak shows up, the farther back in the barrel the problem is occurring.
If the color change does not show up as a streak, but as a burst of color, then the contamination may be coming from your feedthroat.
If the color change does not show up as a streak, but as a burst of color, then the contamination may be coming from your feedthroat. Color-concentrate pellets may be caught up in the throat, hopper, or feeding system. Even one color-concentrate pellet can cause a significant color change.
Solving the Problem
If the streaking or contamination is in the barrel, try one or more of the following:
- Raise the barrel temperature by approximately 50–100° F (28-56° C) above the normal operating temperature. This will lower the viscosity of the resin, allowing it to be flushed out more effectively by the purging compound. Always stay within the recommended safe temperature range of the resin and purging compound to prevent degradation.
- Run several short bursts of agitation at higher screw speed. This loosens the color or carbon. Subsequently slowing the screw speed allows the purge to expand and then push the loosened contamination out.
- Increase the screw rpm and/or backpressure to improve results by adding force and agitation to the purging process. Be sure to use enough material to fill the barrel, so the purging compound can scrub and push through contamination.
- If your contamination is at the check ring, run several short, high-velocity shots. This should help to dislodge and remove buildup around the check ring.
- Shut down the machine between a resin or color change to allow for additional contamination to be removed from the barrel and screw. Leave a full barrel of purging compound in the machine, then turn the machine off and let it cool down. This cooling process allows the purging compound to bond with any residual contamination on the surfaces during cooling. On startup, the purging compound will flush out the contamination from the machine. If performed regularly, this is also a good preventive-maintenance procedure to keep buildup from forming on the surfaces of the screw and barrel.
If your hot runners are valve gated and you are experiencing problems with one or more gates, close the other gates and purge the troublesome one(s) separately to increase pressure and turbulence.
If the streaking or contamination is in the nozzle or hot runners, try the following:
- Raise the temperature of the nozzle or hot runners 50–100° F (28-56° C) to reduce the viscosity of the resident resin. This makes it easier for the high-viscosity purge to push out the low-viscosity resin. Again, always stay within the recommended safe temperature range of the resin and purging compound.
- If your hot runners are valve gated and you are experiencing more contamination with one or more gates, close the other gates and purge through the troublesome gate(s) separately to increase pressure and turbulence.
- Use short, high-velocity shots to dislodge and remove contamination.
You can avoid clumping or “balling up” in the feedthroat by keeping it cool. This will help solve streaking or specks caused by the hopper or feeding system.
If the problem is in the hopper or feeding system, try the following:
- Implement a standard procedure to clean the hopper and magnets thoroughly with an air hose and/or soft cloth, both before introducing the purge and before introducing the next resin. Check all auxiliary feeding equipment to ensure that no pellets are caught in corrugations or on hidden shelves.
- Avoid clumping or “balling-up” in the feedthroat by keeping it cool. The temperature of the throat coolant should be maintained at 80-120 F (27-49 C). It is best to control the feedthroat temperature as close to 100 F (38 C) as possible. In humid weather, the temperature should be just warmer than the dewpoint to avoid condensation. Also, in some cases, keeping the screw turning at a low speed will help to prevent bridging.
About the Author
Bob Grzegorek is global technical services manager for the Dyna-Purge Div. of Shuman Plastics, Depew, N.Y. He is responsible for assisting Dyna-Purge customers worldwide in achieving maximum results with the company’s line of engineered purging compounds. Grzegorek has worked for both custom molders and extruders in a career of more than 30 years. A specialist in Scientific Injection Molding, he has completed extensive course work with RJG Technologies and John Bozzelli, a nationally recognized leader in Scientific Molding technology. Contact: 317-600-9861; rgrzegorek@dynapurge.com; dynapurge.com.


Related Content

The Effects of Temperature
The polymers we work with follow the same principles as the body: the hotter the environment becomes, the less performance we can expect.
Read More
Know Your Options in Injection Machine Nozzles
Improvements in nozzle design in recent years overcome some of the limitations of previous filter, mixing, and shut-off nozzles.
Read More
How to Optimize Pack & Hold Times for Hot-Runner & Valve-Gated Molds
Applying a scientific method to what is typically a trial-and-error process. Part 2 of 2.
Read More
The Importance of Melt & Mold Temperature
Molders should realize how significantly process conditions can influence the final properties of the part.
Read MoreRead Next

Lead the Conversation, Change the Conversation
Coverage of single-use plastics can be both misleading and demoralizing. Here are 10 tips for changing the perception of the plastics industry at your company and in your community.
Read More
For PLASTICS' CEO Seaholm, NPE to Shine Light on Sustainability Successes
With advocacy, communication and sustainability as three main pillars, Seaholm leads a trade association to NPE that ‘is more active today than we have ever been.’
Read More