Tooling: Clamp Pressure and Cavity Land Area
What you need to know to prevent flashing and mold damage.
You sample a brand-new two-plate, cold-runner mold and the part flashes. You know exactly how much peak injection pressure it took to fill the part. You divided that value by the projected area, which includes both the cavity and the runner areas, to determine the clamp force required to keep the parting line tightly closed. The math says you have enough—but you don’t.
What’s really puzzling is, you know that for this type of mold, there is a very large safety factor built in by taking the peak injection pressure and dividing it by the total projected area. It should take considerably less tonnage to keep the mold closed than the calculated value. There are pressure drops as the material passes through the restrictive machine nozzle tip, the sprue bushing, the runner, and the gates.
It can take 10% or more of the available clamp force just to get the two mold halves to align.
You are actually using only a portion of the peak injection pressure to fill the cavity, which is where the majority of the projected area is trying to blow the mold open. Additionally, the pressure in the cavity continually decreases as the material flows from the gate toward the end of fill. And knowledgeable molders know it only takes about 3000 psi of plastic pressure at the end of fill to pack out a part. So why is it flashing?
Did you account for all the projected area? For a short period of time, the molten plastic within the cavity acts like hydraulic fluid inside a cylinder. It pushes in all directions—not just parallel with the centerline of the machine. If it’s a cam-action mold, a portion of the injection pressure acting on the face of the cam is adding to the forces trying to blow the mold open, especially if the tip of the heel holding the cam in place is interlocked with the opposing side of the mold. Even if a hydraulic cylinder actuates the cam, if there is a heel keeping the cam in position when the mold is closed, a portion of the injection force requires additional clamping force.
This needs to be added to your original estimation of the tonnage required to prevent flashing. I take the projected area pushing against the cam face, multiply it by the sine of the angle of the locking heel, and multiply that by the peak injection pressure. I have seen many molds with very little parting-line projected area that had flashing issues due to a tremendous amount of projected area on the cam faces.
There are several potential processing and material-related reasons for a mold to flash, such as injection speed, barrel temperature, residence time, mold temperature, material viscosity and material additives, such as lubricants. But unless they are excessive, these are not always the primary suspects.
The focus of this column will be on the molding machine and the mold, as they relate to clamp pressure and mold flashing. Ideally, you want a mold to run in the smallest machine possible because the hourly rate of a molding machine is based on its clamp tonnage. Some molds, due to their physical dimensions or required shot size, cannot be installed in a smaller machine. But many molds can.
The issue then becomes, will there be enough clamp tonnage to keep the mold closed and prevent flash from developing on the part, without having to process around it?
Learn More: Know How Tooling
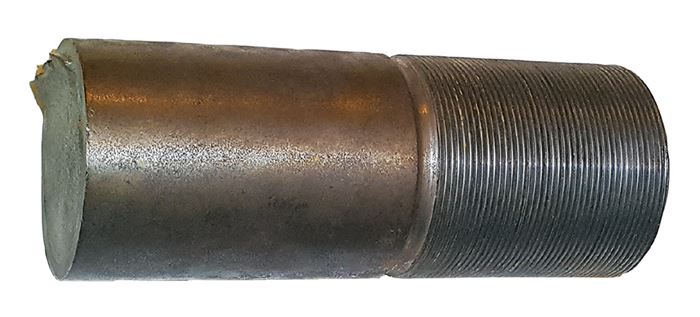
To begin with, a molding machine’s hydraulic piston or toggle mechanism cannot generate any force against a mold without being constrained by the tiebars. Just like a threaded bolt, tiebars stretch when under tension, which is what happens when the clamp closes up against the mold and the system goes into high pressure.
If they don’t stretch evenly—within 0.002 in. of each other—it will put an uneven load on the mold. This can cause damage to the tiebars, platen, and mold, as well as cause a part to flash.
I once read that it can take 10% or more of the available clamp force just to get the two mold halves to align. A worn platen, worn tiebar bushings, improperly adjusted moving-platen support feet, a machine that’s not level, and uneven tiebars can cause the mold halves not to be parallel, especially if the mold is heavy relative to the size of the machine. In severe cases, the moving platen can tilt on an angle large enough to cause leader pins to hit their bushings lightly when the molds close. So it makes sense that some amount of force is required just to align the mold halves.
Conical interlocks are notorious for thermal misalignment issues.
If the mold is fairly large and you are using different cooling temperatures on the injection and ejection sides (typically to prevent a part from sticking), some types of interlocks will try to prevent the mold from closing. The difference in thermal expansion of each mold half will cause the interlocks to be misaligned.
When the mold closes, the clamp will try to re-align them—and that takes force. For the sake of example, say the interlocks are 24 in. apart and the temperature differential (ΔT) of one mold half vs. the other is 40 F:
24 in. x 40 F x 6.3 x106 (in./in. -F) = 0.006 in.
Conical interlocks are notorious for thermal misalignment issues, especially if they are preloaded. Bar interlocks are even worse if they are installed in a direction that does not allow for thermal expansion and contraction.
Assuming the machine, process parameters and material aren’t the cause of the flashing, the next thing to do is “blue off” the mold inside the press using Engineer’s Blue. Engineer’s Blue is a mixture of Prussian Blue pigment and an oily material, such as grease. It’s nontoxic, highly pigmented and non-drying. Engineer’s Blue is also known as Machinist’s Blue, Scraping Blue, High Spot Blue, or (technically incorrectly), Prussian Blue, or simply Blue. But don’t confuse Engineer’s Blue with Layout Blue.
Layout Blue is Prussian Blue mixed with methylated spirits to form a quick-drying stain, used when laying out and scribing lines on plates or parts to be machined. Moldmakers almost always “blue off” a mold during the final assembly and “fitting” stages of mold construction, primarily to check the mold’s shutoffs. They typically apply the blue with a paintbrush that has shortened bristles. I prefer to use a fine, closed-cell sponge—the type used to apply makeup. I apply a thin layer completely around the perimeter of the cavity, on the face of the sprue bushing, on top of the return pins, on any shutoff surfaces, on the sides of the interlocks (integral to the cavity or separate components), on the faces and heels of the cams, and especially in all four corners of the mold.
After the blue is applied, the mold is closed on the workbench or in a “spotting press”; pressure is applied, and then the mold is opened and inspected. Areas that had no contact with the opposing half of the mold will only have bluing on the side it was applied to. Areas that had full contact will have very little bluing on both halves, because it was “squished” out. And there will be spotty areas somewhere in between these two conditions.
(Note: It’s wise to wear latex gloves when applying blue to a mold. This stuff does not want to wash off. Mold cleaner, acetone and most other solvents will take it off—and leave your skin bone dry. There is a water-soluble Machinist’s Blue, which is easy to wash off, but I don’t think it works as well as the oil-based type.)
When a mold is mounted in a molding machine, several additional variables come into play that may not show up on a workbench or in a spotting press. The first thing you want to do is quantify how much tonnage it takes to make the mold halves align. Secondly, you want to check for areas other than the perimeter of the cavity that may be hitting excessively hard and robbing you of the clamp force necessary to run in a smaller machine without flashing.
If your machine can be set at a very low clamp force, close the mold at only 5% of the maximum force. Open the mold and inspect the blue. If there’s not a uniform impression around the perimeter of the cavity, increase the clamp force incrementally by 5% and repeat the process until it does. That’s how much tonnage is required to straighten out the mold halves, and should be subtracted from the total clamp force when calculating the available tonnage to prevent flashing.
Some people suggest using a piece of paper around the perimeter of the part to perform this test. I prefer to use Engineer’s Blue. Even though a sheet of paper is only 0.0035-in. thick, any amount of thickness can give you erroneous results. Other people like to use pressure-sensitive film to check all the areas of the mold. The big advantage of using this film is that it turns various colors based on the amount of force it is subjected to—quantifying the amount of force without the need for any special devices. The downside of using this film is that it is not easily applied to contoured surfaces, it’s 0.0045 in. thick, and it’s considerably more expensive than a tube of Engineer’s Blue.
The nice thing about performing this alignment test is that it considers all the mold components that are preloaded. Some of these components are cam heels (wedges), angled cavity shutoffs, parting-line or cavity interlocks, support pillars, and coil or urethane springs on the parting line or between a set of mold plates. Except for the springs, it’s almost impossible to calculate exactly how much resistive force preloaded components generate. As much as I am in favor of mold-filling simulations, I doubt any of them can account for these preload conditions.
As you progressively increase the clamp force, you will start to see some areas hitting harder than others. That’s because they are protruding slightly higher than everything else. Whatever is hitting first becomes the primary bearing surface, which will be subjected to higher clamp force, and will reduce the amount of force around the perimeter or land area of the cavity. Looking at it another way: To close a mold completely, anything that is protruding or is preloaded has to compress, bend, flex, twist or break, or it has to cause something else to do the same.
I have blued off literally hundreds of molds in my career, but never at low clamp pressures to see what was required just to get them aligned. So, I tested a half-dozen molds in machines ranging from 60 tons to 600 tons, and the results were incredibly informative. The lightest molds in the smallest machines took between 5% and 10% of the total clamp force to align the two halves. The heaviest molds in the largest machines took between 10% and 20% to align, and most of them hit at the top of the mold first because the moving platen was slightly tilted.
The real eye-opener for me was the medium-sized molds in medium-sized machines (100 to 300 tons). At 10% to 20% of clamp force, there was a wide variety of areas that blued off first: a sprue bushing, a return pin, an interlock, a corner of the mold base, a corner of a core insert, or the center of the mold (which had a preloaded support pillar).
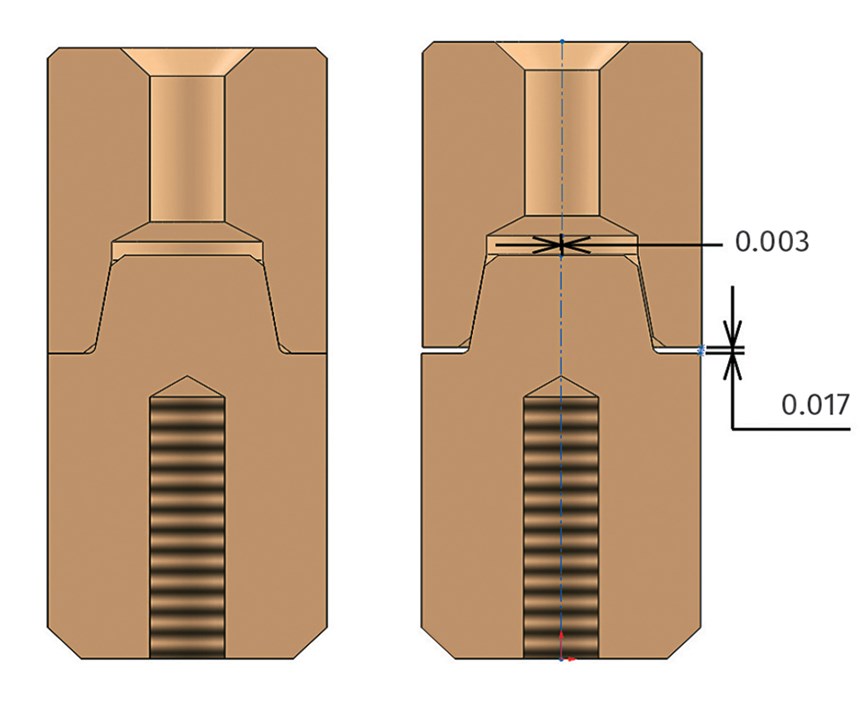
Amazingly, on the molds that had an area or two that hit hard, it took 30%, 40%, even 50% of the available clamp force to get the remaining areas to blue off. Just 0.002 in. or 0.003 in. in the wrong spot was enough to require a significant amount of clamp pressure to seal the perimeter of the cavity in order to avoid flashing.
They say that a molded part speaks to a plastics engineer. I can now say without hesitation that a blued-off mold under low clamp pressures speaks even louder.
ABOUT THE AUTHOR: Jim Fattori is a third-generation injection molder with more than 40 years of molding experience. He is the founder of Injection Mold Consulting LLC, and is also a project engineer for a large, multi-plant molder in New Jersey. Contact jim@injectionmoldconsulting.com; injectionmoldconsulting.com.
Related Content
Understanding Melting in Single-Screw Extruders
You can better visualize the melting process by “flipping” the observation point so the barrel appears to be turning clockwise around a stationary screw.
Read MoreWhere and How to Vent Injection Molds: Part 3
Questioning several “rules of thumb” about venting injection molds.
Read MoreThe Effects of Time on Polymers
Last month we briefly discussed the influence of temperature on the mechanical properties of polymers and reviewed some of the structural considerations that govern these effects.
Read MoreThree Key Decisions for an Optimal Ejection System
When determining the best ejection option for a tool, molders must consider the ejector’s surface area, location and style.
Read MoreRead Next
Making the Circular Economy a Reality
Driven by brand owner demands and new worldwide legislation, the entire supply chain is working toward the shift to circularity, with some evidence the circular economy has already begun.
Read MoreSee Recyclers Close the Loop on Trade Show Production Scrap at NPE2024
A collaboration between show organizer PLASTICS, recycler CPR and size reduction experts WEIMA and Conair recovered and recycled all production scrap at NPE2024.
Read More

