Dead Screw Talking
There's a lot you can learn by conducting a post-mortum examination of your screw.
Screws don’t really die; they just pass away to the scrap yard. But you can learn a lot by performing an “autopsy” on your screw before you heave it. Examining the carcasses of worn or poor-performing screws can often uncover information that is difficult to determine with the screw still in service. I call this process “forensic screw design.”
WHAT THE ‘CARCASS’ SAYS
Screws are seldom removed when they are performing at the expected performance level. So become a forensic examiner yourself and carefully examine every screw when it is removed to determine the telltale signs of its demise. The information in the “carcass” will usually provide strong clues as to why there were performance issues and how they might be corrected.
Areas of high wear on the screw flights can reveal either a design issue or an alignment problem. If the flight has a burr on the trailing edge, it means the screw has a high, localized, and unbalanced pressure that is forcing the screw aggressively to one side of the barrel. This is causing the flight to gall with the barrel, and the flight is being distorted by the mechanical pressure. This usually occurs in an area that is plugging with solids, causing very high pressure on one side of the screw.
The solution would be more melting area in the design to relieve the plugging and pressure point, or a design that balanced the pressure better. These extreme pressure points can show up as surging output as these areas plug and unplug, as I mentioned in an my May column on surging.
If the flight has a burr on both sides, it usually indicates that the barrel is not properly aligned or is bent, and the screw flight is simply being crushed as it is forced to rotate in a space that is not concentric with the screw. Failure of the flight’s hard-surfacing material is always suspected to be due to a poor weld but may in fact be due to either severe abrasion against the barrel from a localized high-pressure area or flexing of the screw due to misalignment.
Wear on the flights or on a mixer at the screw tip indicates a bent barrel. Many times this is due to a large, unsupported weight on the end of the barrel or misalignment of the front support. Wear on the drive end before the start of the flights indicates that the feed throat is not aligned properly with the drive quill. If the wear extends farther on to the early flights, then both the barrel and feed throat may not be aligned with the drive quill.
Areas that have a blue tint to the screw metal indicate the screw is being subjected to a very high temperature in that area, probably exceeding 750 F, which will result in a broad temperature gradient in your extrudate. Again, that indicates that area is plugging with solids and being exposed to very high shear stress or is being rubbed against the barrel with such force that it is causing high frictional heat.
Heavy buildup of polymer on areas of the screw can indicate several things. It could suggest an area of insufficient polymer flow, allowing material to stagnate and degrade. Or it could indicate an extremely hot spot that causes polymer degradation. This could be caused by the screw design or by problem with a heater/thermocouple on the barrel. Areas showing several different colors of material buildup also indicate areas of low or stagnant flow. These can be corrected by increasing the flow rate in these areas—usually by reducing the channel volume. This is often an issue in the melt channel of barrier screws where the channel is too deep or narrow.
Flights or other elements that appear “washed out” indicate an attack by hard contaminants or fillers in the polymer. If the wash-out is localized, the wear rate can often be reduced by allowing for lower flow rates in that area. At extremely high velocities, contaminants or fillers work like an abrasive paste, cutting their own clearance.
Related Content
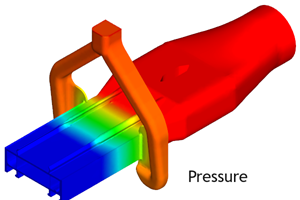
Updated Software Reduces Die Design Iterations
New software said to reduce the number of fine-tuning iterations and die development time by at least 50%.
Read MoreMedical Tubing: Use Simulation to Troubleshoot, Optimize Processing & Dies
Extrusion simulations can be useful in anticipating issues and running “what-if” scenarios to size extruders and design dies for extrusion projects. It should be used at early stages of any project to avoid trial and error and remaking tooling.
Read MoreIs Your Die Flow Changing Despite Following All the Correct Formulas?
Maybe the problem is that you're starting up with a dry die. Here are tips to solve this issue.
Read MoreHow to Effectively Reduce Costs with Smart Auxiliaries Technology
As drying, blending and conveying technologies grow more sophisticated, they offer processors great opportunities to reduce cost through better energy efficiency, smaller equipment footprints, reduced scrap and quicker changeovers. Increased throughput and better utilization of primary processing equipment and manpower are the results.
Read MoreRead Next
Lead the Conversation, Change the Conversation
Coverage of single-use plastics can be both misleading and demoralizing. Here are 10 tips for changing the perception of the plastics industry at your company and in your community.
Read MoreMaking the Circular Economy a Reality
Driven by brand owner demands and new worldwide legislation, the entire supply chain is working toward the shift to circularity, with some evidence the circular economy has already begun.
Read More
.jpg;width=70;height=70;mode=crop)


