Shutting Down & Starting Up An Injection Molding Machine
Whether your press is going down for repairs, a holiday, or a slow production schedule, proper shut-down and start-up procedures must be followed.
There is more to shutting down or starting up a molding machine than flipping switches. Whether it is going down for repairs, a holiday, or a slow production schedule, it must be done properly. Plus, there are significant cost savings to powering off idle machines. I recommend you develop a policy that if the machine will not see production for “X” hours you power it down.
The “right” number of hours depends on the machine size, resins used, and how your plant operates. For a general rule, if the press will be idle for longer than twice its startup time, start thinking about shutting it down. Let’s run through a shutdown and startup for a machine in production.
SHUTTING DOWN FOR HOURS OR DAYS
There are various production, scheduling, and plant scenarios to consider, so these suggestions are meant as a guideline—tweak them to fit your needs. The first goal is to take care of production: Make sure you have good parts to fill the order and check to ensure the order has not changed before you start the shutdown. There’s nothing worse than shutting down only to find out the customer has changed the order and you need another bin of parts. It happens all too often in many plants.
With the good parts out of the way and protected, empty the hopper and vacuum the spills, etc. all the while looking for issues with the machine. If it’s going to be idle, this is a good time for preventive maintenance, so production is less likely to be interrupted. If you see anything, let maintenance know (preferably in writing) so it is not forgotten. If the machine is on cycle, let it run until the barrel is empty, or stop the cycle. Pull the injection unit back a little and then bring it forward and check that it is aligned with the sprue bushing. If it isn’t, get maintenance on it, as alignment is a safety issue. When in the back position, purge the remaining material. Take note of the nozzle body tip, heater bands, thermocouples, etc. Often this area gets abused and repairs are needed.
Depending on resin type and best practice to minimize degradation, you may want to purge the resin with a relatively inert material such as polyethylene, polystyrene, or a stable purging compound. There are a host of resins that you should not leave in the barrel any longer than necessary, such as PVC or acetal (POM). If you are running certain clear materials you may want to bank the heaters, but normally the barrel heaters will be turned off. Usually it is best to leave the barrel as empty as possible.
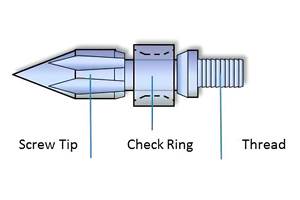
However, instead of leaving the screw bottomed at zero or in the most forward position, I recommend you suck it back an inch or two. Why? Because it leaves the check valve in the forward or open position. Upon startup, when the barrel is up to temperature and heat-soak time has elapsed, it is good practice to first drive the screw forward, freeing the sliding ring just in case there is any unmelted material hung up. Don’t just push the screw-rotate button. This way there is less torque on the tip assembly and wear on the seat of the check valve upon screw rotation.
With the barrel empty and the screw in this backed-up position, it is time to turn the heats off. Prep the mold, surface clean (no water) and spray with an appropriate mold or no-rust spray. I like the newer dry sprays as they are less oily and often save a few shots on startup. If the mold is to stay in the press, close the platen to nearly a kiss. Make sure the water supplies are off and in good shape.
Do not lock the clamp. Remove the mold if appropriate and note whether it needs work or is ready to run, and label it as such. The mold should have a book kept with it to provide a history of issues, cleanings, repairs, etc. Clean the platens and purging area. I like spraying the purging area with mold release—over time, a film builds up and purgings do not stick. If the platens are where you want them, turn off the hydraulics. If appropriate, power down the controller. Finish cleaning up. I know this is no fun, but it is necessary.
STARTING UP A COLD MACHINE
Before you power up the machine take a mental moment and ask: “Who is responsible for my safety?” Answer: You. These machines generate high pressures and temperatures, so take the time to check out the machine before powering up. Are there any water, oil, or hydraulic lines, power cords, etc. in the wrong place? Did anybody work on the machine? Walk around it and look for anything unusual. Nothing like throwing the breaker and seeing sparks fly. If it is a breaker, use appropriate protective equipment, glove, face shield, or whatever is required for this piece of equipment.
With the main power on, turn on the power to the machine and controller, if that is a separate switch. Give the computer some time to boot if the press is computer controlled. Check safeties as necessary: doors, nozzle shield, etc. Is the injection unit clear to slide, with no tools, resin, hoses, etc. in the way? Find the right paperwork for the mold to be run, check that the mold is available and not lost or in the repair shop. I think some managers would be surprised how much time is lost looking for molds. Are the correct resin and color available?
If all is a go and you are ready to hang the mold, find and set the correct barrel-temperature settings or call up the stored program (but double-check the temperature settings). Then turn on the heats. Hang the new mold or prep the existing one. Check water fittings and hose routing. Are the connections tight with no leaks? Check out mold and clamp movements. Are they smooth? Pay special attention to mold protection. Molds are expensive and crashing one when production is needed will not make anyone’s day. Take the time to get mold protection and clamp tonnage (not always maximum) set correctly.
Before you load the resin into the hopper or allow it to flow into the feed throat, check to see that it is clean and free of dust and contamination. Also, wait until the barrel is up to temperature and the heat-soak time has elapsed. Instead of starting with screw rotate—and, remember, you left the screw an inch or two back—set the hold pressure to a low value and press the inject button. The screw should move forward, clearing the sliding ring. Now use screw rotate to see if it turns smoothly with no odd noises. If the screw does not turn smoothly, debug the problem; at least you do not have to empty the feed throat. If all is good, load the resin, purge but do not waste resin, then build a shot.
Before you shoot the first shot, check to see if shorts eject or stick in the mold. If this mold has problems ejecting shorts, triple-check that you have enough shot to make an ejectable part. If allowed, use mold release if first-part ejection is problematic. Check part-removal automation. Make your first shot on semi-automatic, ensure it ejects cleanly or the robot functions as desired. If all is well, make another shot and go to full auto. Check that the fill time is on target and watch the pressure at transfer. Check whether the cycle time is at “standard,” cushion is appropriate, and screw rotate time is at target. When the pressure at transfer stops trending, stabilizes, and part temperature stops climbing, take parts to QC for inspection. Yes, I know I did not say to check the melt temperature. It is important but you will not get an accurate reading until startup lines out.
ABOUT THE AUTHOR
John Bozzelli is the founder of Injection Molding Solutions (Scientific Molding) in Midland, Mich., a provider of training and consulting services to injection molders, including LIMS, and other specialties. E-mail john@scientificmolding.com or visit scientificmolding.com.
Related Content
Got Streaks or Black Specs? Here’s How to Find and Fix Them
Determining the source of streaking or contamination in your molded parts is a critical step in perfecting your purging procedures ultimately saving you time and money.
Read MoreUsing Data to Pinpoint Cosmetic Defect Causes in Injection Molded Parts
Taking a step back and identifying the root cause of a cosmetic flaw can help molders focus on what corrective actions need to be taken.
Read MoreProcess Monitoring or Production Monitoring—Why Not Both?
Molders looking to both monitor an injection molding process effectively and manage production can definitely do both with tools available today, but the question is how best to tackle these twin challenges.
Read MoreThree Key Decisions for an Optimal Ejection System
When determining the best ejection option for a tool, molders must consider the ejector’s surface area, location and style.
Read MoreRead Next
Making the Circular Economy a Reality
Driven by brand owner demands and new worldwide legislation, the entire supply chain is working toward the shift to circularity, with some evidence the circular economy has already begun.
Read MoreSee Recyclers Close the Loop on Trade Show Production Scrap at NPE2024
A collaboration between show organizer PLASTICS, recycler CPR and size reduction experts WEIMA and Conair recovered and recycled all production scrap at NPE2024.
Read MoreBeyond Prototypes: 8 Ways the Plastics Industry Is Using 3D Printing
Plastics processors are finding applications for 3D printing around the plant and across the supply chain. Here are 8 examples to look for at NPE2024.
Read More
.jpg;width=70;height=70;mode=crop)


