Tooling: Setting Up Shop—Part II of III
Many repair shops in molding facilities are too small, poorly lit, and inefficiently designed.
Many repair shops in molding facilities are too small, poorly lit, and inefficiently designed. Some are downright unsafe—for example, lacking a hoist. And the principle of organization, if you can call it that, appears to be “just stick it over there,” so shops become slippery obstacle courses.
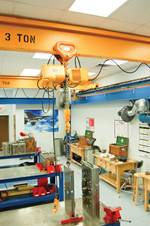
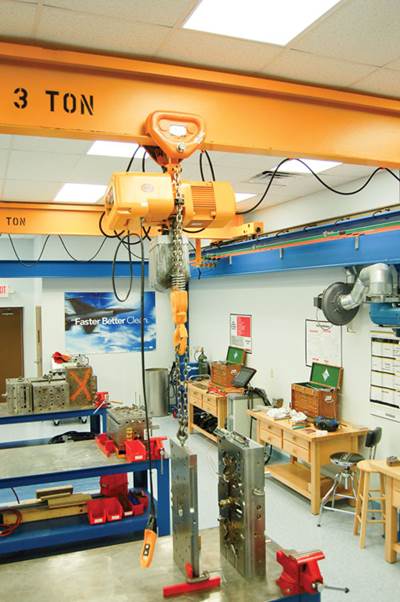
It is imperative for a mold-repair shop to be well thought out—from the overhead hoist system to the salvage tooling bins—to keep maintenance unencumbered by bottlenecks while technicians scramble to move, bench, separate, clean, assemble, test, and rack molds.
For those lucky enough to start from scratch with a wide-open floor plan, or are beginning a “shop improvement” initiative, you will need to determine your repair shop’s size requirements. The first thing to do is to establish, as closely as possible, the amount and type of repair work and number of molds the shop will see per week, along with projected growth. The type of product molded, physical mold size, and MPP (mold pull pace) will dictate some of the shop’s design features and ancillary requirements.
Then you must determine (again as closely as possible) how many of these molds will be long-runners requiring full C/Rs (clean and repair), short-runners requiring only wipe-downs, or changeovers—the latter two greatly reducing the time a mold spends on the bench.
In a survey of Midwest mold shops, the average number of molds pulled and set (scheduled) during a five-day week was 1 per press/week. The average number of presses was 20. Unscheduled mold pulls can add another 20% to 40% to this total. Based on this MPP calculation, we will design a hypothetical shop geared to handle the workload of cleaning and repairing each week around 25 molds with 32 cavities each and weighing up to 7000 lb.
The MPP chart on this page shows how much work is required of each repair technician (yellow) to keep up with mold pulls (blue) based on average mold cavitation (purple) and number of repair technicians (green).
According to the chart, the MPP of our hypothetical shop would require a minimum of four repair techs to clean and repair at least one 32-cavity mold each per 8-hr day. This is not unlike the shop pace where I spent 24 years as a toolmaker, and I can tell you that implementing an efficient and accurate C/R on a 32-cavity mold in 8 hr leaves no time for wandering around searching for tools or fantasy football discussions.
Since our shop will employ at least four repair technicians, that means four benches minimum. Some might wonder whether four guys working on two benches can handle the same MPP workload. The answer: not efficiently. Ample bench space is essential to a smooth-flowing workload. Regardless of how well a shop is run, there will always be the unplanned mishap, new mold arrival, or schedule change that will require immediate bench space.
Besides, most guys hate working on someone else’s bench. A bench gets “personalized” over time with just one person’s hand tools and setups.
IT’S ALL ABOUT THE BENCH
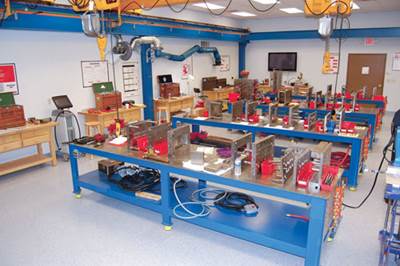
Now that we know the projected shop capacity, workbench layout is the next critical feature of a shop. The size, location, and position of the workbenches must be relevant to the mold type, room entrance/exit, and cleaning stations for ease of mold traffic flow. Think this through, because everything else in the shop depends on bench position.
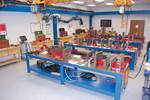
This shop will be approximately 50 × 50 ft, allowing ample room for a cleaning area, storage cabinets, inspection bench, and shop bench or desk for each technician. This also provides room for unencumbered personnel and toolbox movement around the benches and easy monorail or bridge crane installation overhead.
Four benches in a single row will work well in our square footprint. Since this shop will also be engaged in mold rebuilds, it must share space with a few metalworking machines. Chip-producing machines should be at least 10 ft from the mold benches, and those producing grinding dust at least 20-ft away, to avoid contaminating mold surfaces and the surrounding work space. A center aisle “buffer zone” between our four benches and the machine tools provides space to help keep things orderly, clean, and safe.
When you make your living behind a bench, it is critical that the mold is at an ergonomically comfortable height, allowing you full control of plates and tooling during repairs. This is normally 34 in. for a person of average height (5 ft, 10 in.) working on molds no more than 48-in. tall.
Some benches are custom built with multiple levels, which allow you to disassemble a tall mold at the low end, say 20- to 25-in. high, then move the sub-components and assemblies to the fitting side, which stands 40 in. or higher. This puts you in a better position to see, manipulate, and fit small components. Benches under 34-in. high will cause you to stoop, leading to back and shoulder troubles, while a taller bench (over 36 in.) will cause you to work holding your elbows too high, outside the body’s “power zone,” and not leave you in good control of tall mold plates.
Bench length should never be less than 12 ft unless you have very small molds with few plates. Short benches won’t allow complete disassembly of larger molds with several plates, which will promote incomplete repairs, mistakes, and wasted time moving mold sections on and off the bench.
People try to save money on workbench design and construction, assuming that just about anything will suffice, as long as it will bear the molds’ weight. A good example is a steel saw-horse type bench, where someone merely welds a couple of hefty square rails to some legs. It will hold a mold, but don’t even think about trying to turn the mold or plates to a comfortable working position, such as facing you and leaning back at a 45° angle. They can easily slip off the skinny rails and end up on the floor or your feet. Hand tools and mold tooling can’t be conveniently placed on the bench during repairs as they too eventually end up on the floor, or you pile everything on your toolbox while you work.
Here are some other pointers of good workbench design:
- A good benchtop should be 3/8-in.-thick, cold-rolled steel with a 1-in. radius on each corner. You don’t need a 1-in.-thick top to hold a 10,000-lb mold, and the extra thickness will easily double the cost of a bench. It is more cost-effective to add angle-iron bracing under a 3/8-in. top, spaced every 3 ft across the width. This adds plenty of strength and keeps the top flat through years of service. Just make sure your welder uses straight braces and doesn’t get things too hot or the top can warp.
- Add a full-length, 1/4-in. steel shelf about a foot off the floor for storing all the gear it takes to maintain molds.
- Install at least four standard 110V outlet boxes around the bench.
- Install at least four quick-disconnect air couplings.
- Mount 240V and 480V, 3-phase outlet boxes for controllers under the top, far enough back so liquids can’t drip down on them.
- Install adjustable leveling pads (not wheels) under each leg. A 12-ft bench in this weight capacity needs a minimum of six legs.
- Mount a 5-in. machinist’s vice on one end of the bench.
A commercially available bench with these features costs around $4000. Some vendors will even grind the top for a dead flat surface. All you have to do is level the bench, smooth out any grinding marks with 180-grit paper on a disk sander, wax the top, and you’re ready to go.
In Part III we’ll discuss the most expensive tool in your shop—the hoist-system: options, costs, pros and cons.
About the Author
Steven Johnson is the operations manager for ToolingDocs LLC, part of the PCIC Group of Companies. Steve also has is own business, MoldTrax in Ashland, Ohio. He can be reached at steve.johnson@toolingdocs.com or (419) 289-0281.
Related Content
Where and How to Vent Injection Molds: Part 3
Questioning several “rules of thumb” about venting injection molds.
Read MoreWhy Shoulder Bolts Are Too Important to Ignore (Part 1)
These humble but essential fasteners used in injection molds are known by various names and used for a number of purposes.
Read MoreThe Effects of Time on Polymers
Last month we briefly discussed the influence of temperature on the mechanical properties of polymers and reviewed some of the structural considerations that govern these effects.
Read MoreHow to Select the Right Cooling Stack for Sheet
First, remember there is no universal cooling-roll stack. And be sure to take into account the specific heat of the polymer you are processing.
Read MoreRead Next
Tooling: Setting Up Shop: Part III
Our last column covered shop size and bench requirements for a 50 x 50 ft mold-repair shop that will have a MPP (Mold Pull Pace) of approximately 25 to 30 multi-cavity molds a week and employ four repair technicians in a six-bench layout.
Read MoreTooling: Setting Up a Mold Shop: Part I
I had a toolmaker once tell me he used to slam his hand in his car door before work every morning just to get him in the right frame of mind to work in his shop.
Read MoreSee Recyclers Close the Loop on Trade Show Production Scrap at NPE2024
A collaboration between show organizer PLASTICS, recycler CPR and size reduction experts WEIMA and Conair recovered and recycled all production scrap at NPE2024.
Read More
