X-Ray Vision Inside Parts Gets More Affordable for Processors
Shimadzu’s new benchtop x-ray CT scanner provides internal and external metrology and flaw detection at a fraction of the previous cost.

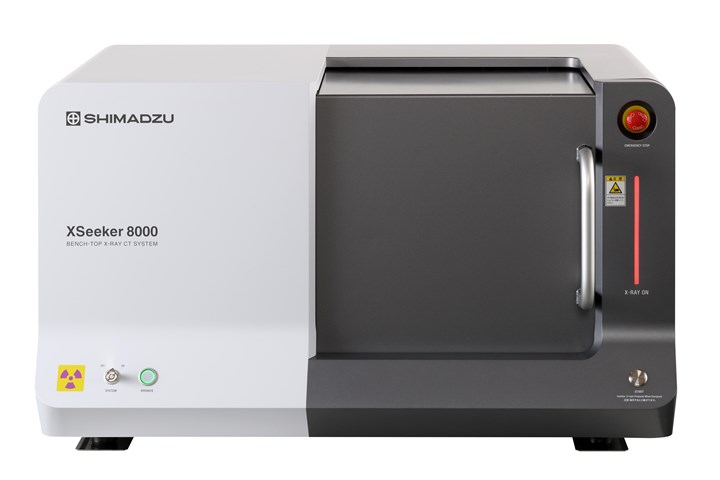
New Shimadzu XSeeker 8000 benchtop x-ray CT scanner costs about 20% as much as the company’s main floorstanding model. (Photo: Shimadzu Scientific Instruments)
Last week, I invoked the theme of x-ray vision in a figurative sense, writing here about MES systems that use real-time production data to give processors an “inside view” of their operations. Today, I’m talking about actual x-ray vision inside plastic parts and even some metal components.
In recent years, we have published close to a dozen articles about using 3D x-ray computed tomography (aka CT scanning) to look inside plastic parts and assemblies to inspect internal features and identify voids. CT scanners also provide extremely precise external metrology. As we have reported, a growing roster of molders is finding that CT scanning can speed product development and mold qualification – generating, for example 50,000 measurements in 65-85% less time than a conventional CMM. Precision molders and micromolders have come to rely on x-ray CT scanning as an essential technology.
But its growth has been hampered by the high capital cost of CT scanning equipment – often in the $500,000 to $750,000 range, though at least one model for around $200,000 arrived in the last five years. CT scanning service bureaus have emerged to fill the need. (I was gratified to learn from the founders of one of the first of these firms that he got the idea from reading an article in Plastics Technology about the promise of CT scanning.)
Since I have been following this technology for eight years or more, I was encouraged to learn last week that industrial CT scanning machines have crossed a new threshold of affordability and compactness. Shimadzu Scientific Instruments in Columbia, Md., has come out with a benchtop x-ray CT scanner that costs around 20% as much as the company’s primary floor model.
Shimadzu’s new XSeeker 8000 unit can hold samples up to 11.8 in. in diam. and 12.6 in. high. A scan can be completed in as little as 12 sec, thanks to proprietary software, which offers both cross-sectional and 3D volume views of scanned objects. The new unit measures approximately 3 ft long × 2.4 ft high and weighs 638 lb. Shimadzu’s flagship floor-standing model InspeXio SMX-225CT FPD HR Plus measures around 7.1 ft long × 6.1 ft high and measures samples up to about 15.75 in. diam. × 11.8 in. high.
Shimadzu’s news appears to be part of a trend to make industrial CT scanning more widely available. There are at least two other benchtop x-ray CT scanners on the market, from Bruker and Rigaku, though the former appears to be aimed mainly at life-sciences applications and the latter has a smaller sample-size capacity and is aimed at “materials-science imaging centers.”
Related Content
-
Redesigned Laser Scanner Boasts Improved Accuracy, Resolution, Versatility, and Efficiency
Nikon Metrology’s new LC15Dx is ideal for efficient measurement and inspection of manufactured components including intricate plastic parts.
-
Measuring Technology Specialist Pixargus Acquired by CiTex Group
A global player in optical inline quality control, Pixargus is intensifying presence in U.S. & Asia under CiTex umbrella.
-
Try This Alternate Method for Heating Your Torque Rheometer
Rheometers are generally not on all the time. And most users have found that the first test run in the instrument after heating up is not very reliable and is usually discarded. Try this method instead.


