Custom Molder’s Strategic Edge: Top-Class Metrology Services
Molding good parts is not enough. Better and faster metrology services for tool qualification and process validation make the difference for Octex Group.
Octex is more than a molder. The Octex Group in Sarasota, Fla., comprises three companies: Octex custom injection molding division, which has a growing emphasis on value-added secondary operations like decorating and assembly; Choice Tool & Mold, the moldmaking arm; and Omnia Scientific, the metrology business. The latter two units serve primarily outside customers. Omnia, one of the faster-growing parts of the Group, has become a major focus in differentiating Octex from its competitors.
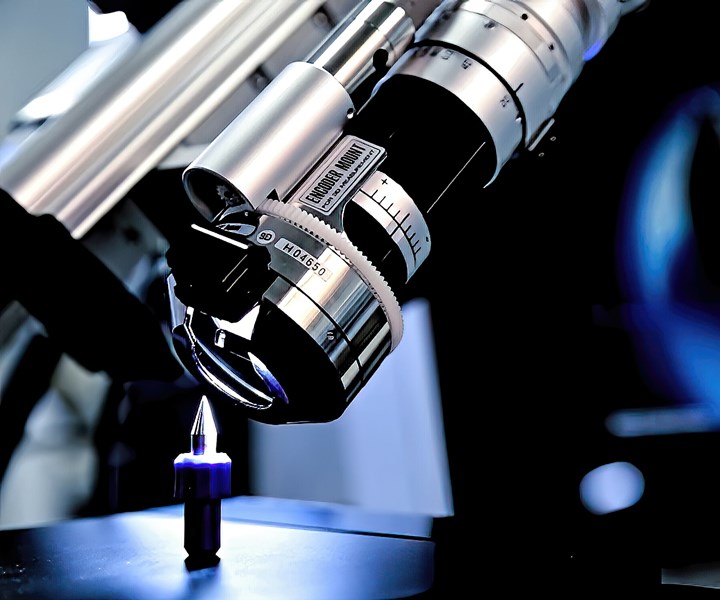
Metrology services dedicated to plastics injection molding is an important factor differentiating Octex from its competition.
Nowadays, Octex Group pursues mainly medical business, which accounts for 65-70% of its revenue. The remainder is a mix of high-end electronics, aerospace/defense R&D projects, and some consumer and industrial jobs. (For an overall company profile, see Feb. ’18 On-Site feature.)
The Octex molding business and Omnia Scientific occupy a 70,000-ft2 main building, with Choice Tool & Mold housed in 10,000-ft2 next door. The main building has a 5500-ft2 Class 8 clean room with five injection presses, while the rest of the 30,000-ft2 manufacturing area is an ISO Class 6 white room with 24/7 particulate monitoring throughout. The plant operates 15 to 25 injection presses from 15 to 400 tons. “We bring in and release presses according to the programs we have running,” says Brett Wigton, chief technology officer. “When we don’t need a press anymore, we sell it.”
He adds, “Our equipment is becoming specialized for difficult molding.” That means high cavitation (up to 32 with full cavity separation); tight tolerances, such as ±8 mils across 16 cavities for parts “smaller than your pinky tip”; complex geometries, including parts with 1.5-2 mil walls; and micromolding, with a Wittmann Battenfeld 15-ton MicroPower machine.
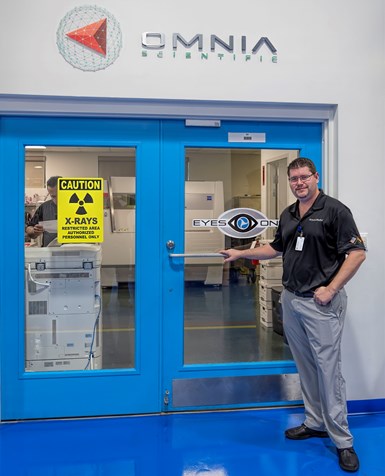
Thomas “TJ” Schuler, director of Omnia Scientific, brings experience in molding, tooling and quality assurance to his firm’s metrology services.
Two examples illustrate how Octex is challenging its equipment and its people to achieve higher levels of quality and productivity. One application is a surgical device that involves a metal rod and spring overmolded with PP on both ends. Four housing parts are molded and assembled around the overmolded metal parts. The assembly receives three sonic welds and pad printing.
Another medical device, for administering intravenous fluids, uses Eastman’s Tritan copolyester, which is recommended by the supplier for molding no thinner than 60 to 80 mils. But Octex engineers gambled that the part could be run at 8-10 mil wall thickness, thanks to the firm’s ample experience with the material, its in-house tooling capability, and its ability to measure and maintain precise tool tolerances. According to Thomas “TJ” Schuler, director of Omnia Scientific, “We had run Tritan for years—we knew about its outgassing and the importance of good venting. We knew what kind of injection pressure we’d need, and what kind of screw and barrel. The cores had to be almost perfectly straight across 16 cavities, because any core wobble would take up 15-20% of the total part thickness. So we CT scanned the tool—including vents, core pins and even cavity-pressure sensors—which helped us modify the tolerance stack-up to less than 16 millionths of an inch (0.016 mils).”
“Our philosophy is that wherever you are in the manufacturing process, we can make it better,”says Wigton. “We ask the important questions up front: How are we going to make this? How will we deal with the tooling challenges? How will we deal with the metrology challenges? How will it be cost-effective to measure this part in production?”
Metrology with a Difference
Omnia Scientific has been a separate operating company since 2016, and its revenue is up 400% since then. Every molding project at Octex utilizes Omnia’s metrology services, though 85% of Omnia’s revenue comes from outside business. Its growth has been largely through word of mouth. “People mail parts to my house on weekends for me to look at,” says Schuler, shaking his head.
“With Omnia, what is most paramount is the team,” says Wigton. “TJ and his engineers are not only metrologists, they are experts in every aspect of injection molding from tool design to the finished product. Their experience in plastics manufacturing and materials, and their understanding of how molding truly works, gives them an edge our competitors simply don’t have. In fact, to my knowledge, there is not a single metrology house that operates as we do. Competitors provide the dimensional geometry of your part, where we provide a full metrology review, which includes everything from dimensional analysis to troubleshooting the tool, troubleshooting the component, and understanding the application and material. We’re able to make suggestions on how issues can be fixed at the tooling, design and manufacturing stages. That helps explain why we have customers who are high-level molders with their own in-house CT scanning, but they still come to Omnia because they are so confident in our ability to provide the most comprehensive analysis.”
Schuler is an example of what makes the Omnia “team” special. “I grew up in plastics manufacturing. Fifteen years ago, as a summer intern at Octex, I was shoveling buckets of plastic pellets into a hopper. That gives you respect for the real challenges of manufacturing.” He has RJG training in processing, materials and troubleshooting, as well as training in Scientific Molding with John Bozzelli (a columnist for this magazine). He has tooling experience, too.
“We’re not just about data on part dimensions, but about the Why? Why are we seeing what we’re seeing?”
“What we do at Omnia is special because I’m a molder, I’m a process guy, I’m a tooling guy. I know what it takes to make a good product. I’ve learned the symbiosis of tooling, manufacturing and quality departments. I don’t think there anyone else in the metrology business who does what I do. You’re not just getting a data sheet, you’re getting my experience in plastics manufacturing.
“Metrology geared specifically to plastics injection molding is special to us. There isn’t a single other metrology house out there that’s dedicated to that.” He adds, “We can accelerate data reporting because we work 24/5 or 24/7, unlike most metrology houses.”
The importance of that dedication and that background of plastics knowledge, Schuler says, is “we’re not just about data on part dimensions, but about the Why? Why are we seeing what we’re seeing? Is a measurement different from spec a tooling issue, or can a shift in process window fix it without expensive tool rework?”
Metrology is still poorly understood by a large part of the industry, in Schuler’s view. “Customers say, ‘These dimensions, these tolerances, are what I need to make my part work.’ But no one thinks about what’s needed to make the part manufacturable, the tool maintainable (what’s going to wear out first), and quality measurable. We can be that bridge.”
He explains further, “We do a metrology review with customers at the start of a project. “How exactly do you want this measured in production? The circularity on this diameter is not called out on the print—how do you want it measured?”
To illustrate the importance of those choices, Schuler cites various measuring technologies available at Omnia. One is touch CMM, very common throughout industry. “It’s very accurate, but limited by how many points it is cost-effective to measure. Do you want to measure four points or 4000? On how many cavities? Time is cost.”
There are also optical 2D vision systems. “This is fast, measuring 200 points in 2 sec,” says Schuler, “but it has multiple sources of bias—illumination intensity, use of backlighting or not, distance of the workpiece from the light source. These factors can all give different measurements of the same dimension. This technology is very repeatable, but not necessarily accurate.” To make it accurate, he recommends starting from a “known true standard”—a CT scan.
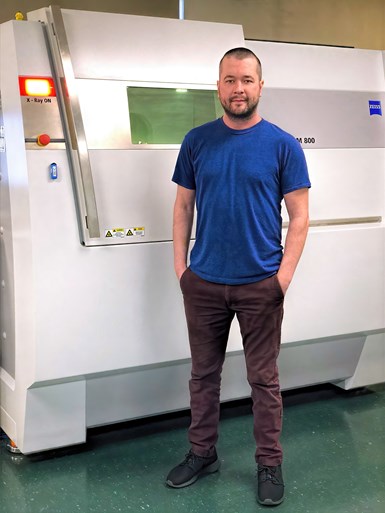
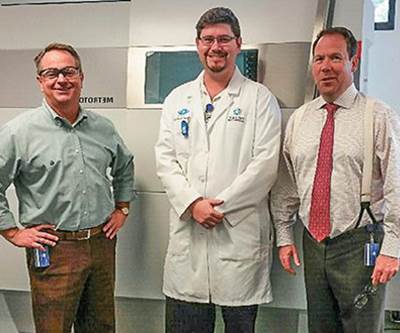
Octex CTO Brett Wigton with the Zeiss Metrotom 800 CT scanner, the “big gun” of Omnia’s metrology lab.
X-ray based CT scanners have gained a reputation as the ultimate metrology tool. Systems like Omnia’s Zeiss Metrotom 800 can generate a “point cloud” of millions of measurements in 1 hr. No fixturing is needed, and the scanner can measure internal features and even entire assemblies. “If you want to measure a critical hole with ±1 mil tolerance in an invisible location inside the part—you need a CT scan,” states Schuler.
But there are limitations here, too. Schuler has noticed that CT scanners are becoming more common among custom molders—despite price tags in the mid-six figures. But in the last year he has seen a trend among other users to packing in more and more parts per scan to save time and cost, though this means greater differences between individual parts’ distances from the emitter source, which affects accuracy. “Others may be willing to sacrifice microns for dollars, but we won’t. Others will give you scan data but won’t show you how they scanned your part. We do, as part of our metrology review.”
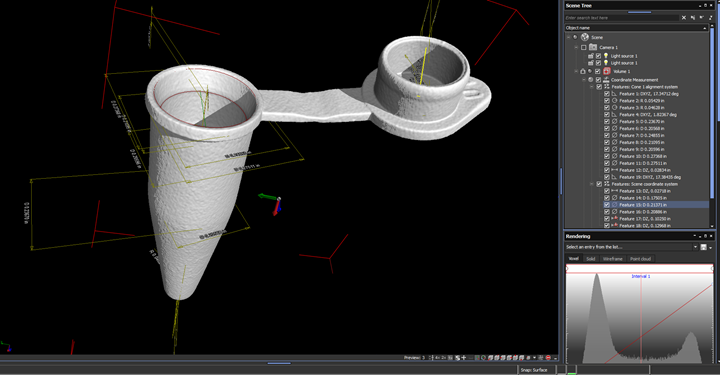
A CT scan of a micropipette, an example of the medical parts that are the backbone of Octex Group’s business.
It’s all part of process validation, Schuler says—“Putting all the systems in place to control and analyze the quality of parts. We develop calibration and control plans. We use Scientific Molding for process development—testing high and low threshholds, finding out what the machine and tool can handle. It’s always a delicate balance between tooling, manufacturing and quality assurance. We fight over 10 thou.”
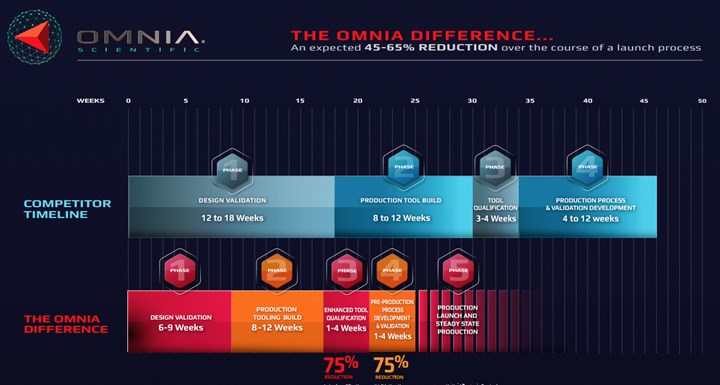
By having design validation, tooling, molding and metrology under one roof, Octex Group says it can cut project launch time by 45-65%.
Compressing time to launch
Wigton points out another factor in the Octex competitive strategy: “Omnia shines in its ability to compress the timeline of a product launch. Our enhanced tool qualification and pre-production process development and validation are faster than any market competitor, large or small. We accomplish this by having design validation, tooling, molding and metrology under one roof.” The accompanying infographic, supplied by Wigton, shows a 45% to 65% reduction in the overall timeline of a launch.
One factor contributing to this compressed timeline is a fiber-optic data superhighway, installed by Wigton to handle the massive load generated by CT scans. Where other metrology firms might require weeks to provide usable data from scans of parts from 32 cavities in a single mold, Omnia can do it minutes.
At other companies, where tooling, manufacturing and metrology are often dispersed among different providers, the “blame game” is all too common: The tool is bad! You can’t process this part! You can’t measure this dimension!
“At Octex, where we do it all, it’s not about who’s at fault anymore, it’s about achieving success quickly,” says Wigton.
Related Content
Extrusion Plastometer is Modular, Easy to Clean
Improved accessibility and optimized surfaces enable the instrument to be cleaned quickly, expediting testing times.
Read MoreHow Inline Vision Inspection Can Minimize Scrap in Molding
Once viewed by injection and blow molders as a necessary evil, machine vision technology today can continuously monitor and improve production while reducing costs.
Read MoreUpgraded CT Scanning and Multi-Sensor Coordinate Measuring Machines
Werth’s TomoScope S Plus 240 systems boast more than double the measuring volume as their predecessor with almost the same size.
Read MoreCP Cone, Plate Viscometers Built for Precision, Consistency
Units feature a robust direct drive motor and an electronic cone lift for precise and consistent results.
Read MoreRead Next
Savvy Molder Willing To Share Its Smarts
OCTEX adds advanced metrology technology to brand-new lab, and will make it available to other molders.
Read More'Engage, Innovate, Evolve': Future-Oriented Culture at Octex Group
Using science, technology, and talent to give high-tech customers unprecedented speed to market.
Read MoreSee Recyclers Close the Loop on Trade Show Production Scrap at NPE2024
A collaboration between show organizer PLASTICS, recycler CPR and size reduction experts WEIMA and Conair recovered and recycled all production scrap at NPE2024.
Read More

