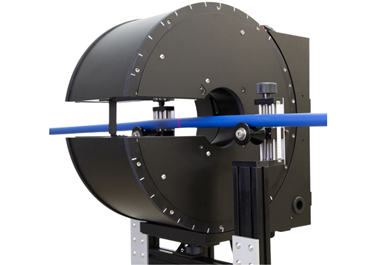
Surface-Flaw Detection for Pipe, Tubing
System offers 360° in-process inspection of pipe, tube, hose, wire, and cable.
FlawSense from LaserLinc uses high-speed laser line triangulation to truly perform 360° in-process inspection of pipe, tube, hose, wire, and cable — regardless of product orientation in the measurement field. FlawSense precisely detects lumps, gels, pits, slits, and other surface defects that conventional laser micrometers, lump and neckdown detectors, and camera-based systems cannot. Manufacturing personnel can review the defects later in 3D for deeper, immersive analysis.
Traditionally, manufacturers have attempted to use a variety of measurement techniques to detect surface flaws, but these have presented numerous problems due to a variety of reasons: the limited measurement points per sensor, inability to measure the full contour of the product, presence of text and labels that create false positives, and blind spots that prevent the detection of pits and slits in the surface. In most cases, these systems offer limited visualization capabilities, making it difficult to verify what was detected.

Photo: LaserLinc
FlawSense, on the other hand, digitizes thousands of individual measurement points around the contour of the product to reveal the smallest surface anomalies. FlawSense then produces a 3D point cloud image rich with informative, actionable flaw data that can be manipulated for further analysis.
FlawSense can reporedly detect surface defects down to 5 microns with 10 times better resolution than camera-based systems. FlawSense also provides significantly more accurate measurements of product diameter and ovality than laser micrometers and camera vision technology.
Related Content
-
How to Select the Right Tooling for Pipe Extrusion
In pipe extrusion, selecting or building a complementary set of tooling often poses challenges due to a range of qualitative factors. Here’s some guidance to help you out.
-
Understanding Melting in Single-Screw Extruders
You can better visualize the melting process by “flipping” the observation point so the barrel appears to be turning clockwise around a stationary screw.
-
How Polymer Melts in Single-Screw Extruders
Understanding how polymer melts in a single-screw extruder could help you optimize your screw design to eliminate defect-causing solid polymer fragments.


