Your Machine is Built…Now What?
Blow Molding Know How
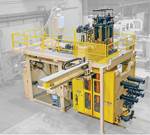
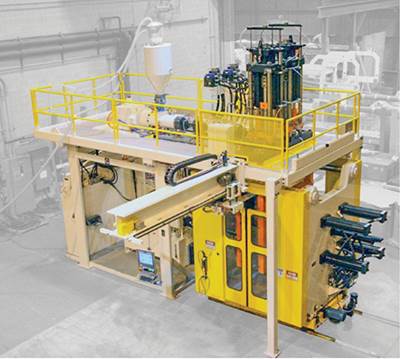
Here is what you need to do to get ready for the installation of your new accumulator head machine.
In my last column, I discussed the steps that you as a blow molder need to take to get ready for your new accumulator-head machine once you’ve ordered it. I called it a pre-installation checklist (see link to article top right).
Now, your machine builder has called you to advise that the machine is done. First, send your molds and material to the machine builder for testing. Once this testing is in process, you will want to put together a “check-out” list before the machine is released to you. See the accompanying checklist for my suggestions.
Once you accept the machine for shipment, note any corrections or missing items that need to be completed. A timetable should be established as to whether the item(s) will be completed prior to shipment or at your plant.
Hold a training session for your personnel during the pre-shipment trials. All aspects of the equipment should be covered during this session. Operators must be provided with in-depth knowledge of the entire blow molding unit. This will include a general machine layout and mechanical features. Pay special attention to the electrical systems, microprocessor controls, and hydraulic components of the machine. These areas are generally problematic for the molders and setup personnel. Many machine controls are numerically represented as a percentage of something. Find out what that “something” is.
After the equipment has been approved for shipment, determine a shipping date. You will require a shipping permit for some trucks for the various states. The appropriate number and type of trucks can be ordered for transportation to your plant. Don’t forget to adequately insure the equipment during shipment to protect against in-transit damage. At this time, the equipment will be disassembled and painted for preparation for shipping. This could take up to four days. Schedule arrival of the equipment with the rigger; this can get expensive, so timing of delivery must be coordinated closely.
Upon completion of the reassembly in your plant, contact the machine manufacturer. Provide advance notice to allow scheduling a service technician to come start up your equipment. Usually the builder will call you to verify that all utilities are hooked up to the machine and it is ready for startup.
Once the service technician arrives in your plant, he or she will perform a complete check of your equipment similar to the pre-shipment testing. The technician will:
•Verify whether any parts are missing or damaged in shipment.
•Check whether machine ground is properly installed.
•Verify incoming voltage on all phases (three).
•Visually check machine to assure proper installation.
•Check for electrical connections.
•Retighten heater bands and straps.
•Check and retighten all bolt connections under proper
temperature.
•Check for proper motor rotations.
•Check water connection to heat exchanger.
•Check air connection.
•Verify hydraulic oil was filtered to 10 micron absolute.
•Verify head and machine are level.
•Check for oil/water leaks.
•Verify molds are installed properly.
•Calibrate clamp zero point with molds mounted.
•Ensure all hydraulic hoses are in proper location and tightened.
•Calibrate tooling (zero and span).
•Set mechanical tooling stops.
•Check for alarm conditions on operator screens.
•Check operation of melt-pressure gage.
•Check operation of rupture-disc limit switch.
•Modify sequence of operation as required.
Upon successful startup and checkout, you will now begin the production cycle on your new equipment. In a perfect world things go well and the equipment runs fine. However, from time to time new components fail during early stages and must be replaced. If you’ve been trained properly you should be able to pinpoint the problem area quickly and solve it. You can minimize downtime by being prepared to face these failures with proper spare parts.
Throughout this entire process your goal is to achieve optimum production in the shortest time. This can be possible with the following considerations:
•Plan early.
•Provide all information quickly to the machine builder.
•Establish what is being built vs. what you want.
•Prepare your plant for new equipment.
•Inform your rigger of all details.
•Get as much training done as possible.
•Do thorough pre-shipment testing.
•Be prepared to receive all of your equipment.
•Plan and be prepared for installation.
Related Content
Three Key Decisions for an Optimal Ejection System
When determining the best ejection option for a tool, molders must consider the ejector’s surface area, location and style.
Read MoreUnderstanding Melting in Single-Screw Extruders
You can better visualize the melting process by “flipping” the observation point so the barrel appears to be turning clockwise around a stationary screw.
Read MoreWhere and How to Vent Injection Molds: Part 3
Questioning several “rules of thumb” about venting injection molds.
Read MoreBack to Basics on Mold Venting (Part 2: Shape, Dimensions, Details)
Here’s how to get the most out of your stationary mold vents.
Read MoreRead Next
Your Pre-Installation Checklist-Part 1
The work really begins after you've ordered your new machine.
Read MoreLead the Conversation, Change the Conversation
Coverage of single-use plastics can be both misleading and demoralizing. Here are 10 tips for changing the perception of the plastics industry at your company and in your community.
Read MoreSee Recyclers Close the Loop on Trade Show Production Scrap at NPE2024
A collaboration between show organizer PLASTICS, recycler CPR and size reduction experts WEIMA and Conair recovered and recycled all production scrap at NPE2024.
Read More
