Exact Metrology Now Distributor of HandsOnMetrology.com
The new digital format was set up to share the benefits of 3D metrology with a global community.

Exact Metrology, div. of In-Place Machining Company and a comprehensive 3D metrology service provider and hardware sales company, recently announced they have become the North American distributor of HandsOnMetrology. The new digital platform HandsOnMetrology.com was set up to share the benefits of 3D metrology with a global community. As a representative of this new 3D scanning network, Exact Metrology will be an official contact for companies in the U.S. who want to optimize their quality control processes with new, state of the art 3D scanning and automation solutions.
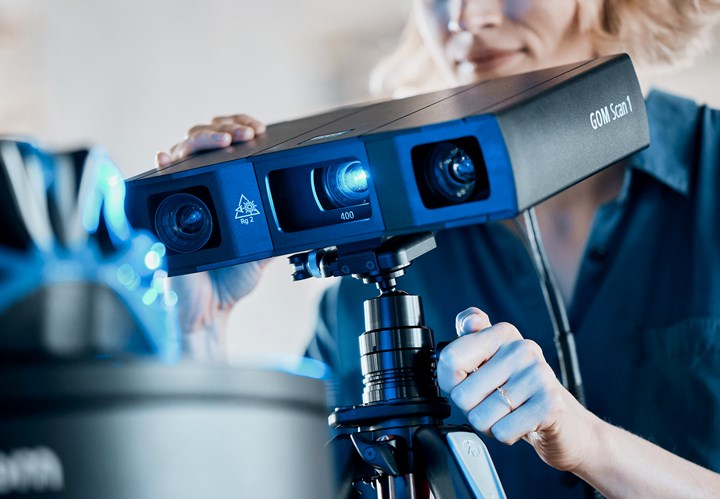
Available at both the Brookfield (Milwaukee), Wisconsin and the Cincinnati, Ohio location, the #HandsOnMetrology portfolio offers measuring systems including GOM Scan 1, ATOS Q, T-SCAN 10/20 and the hand-held T SCAN hawk. Exact Metrology also offers the GOM ScanCobot automation solution.
GOM Scan 1 delivers the foundation for detailed and accurate 3D meshes with industrial standards such as GOM fringe projection technology and Blue Light Technology. The sensor is built to deliver 3D data with high precision. Easy to operate, the scanner is ideal for simple and fast measurements of small to medium-sized parts, even in confined spaces. With pre-installed GOM Inspect software, users can generate precise meshes and obtain 3D data easily and quickly.
ATOS Q is a flexible 3D scanner for complex measurement and inspection tasks in different industries. The scanner delivers fully traceable measurement results, especially in harsh conditions. Optical and electronic systems of the robust, optical 3D sensor are dustproof and splashproof. ATOS Q captures quality information quickly and with a high degree of detail, providing a reliable basis to easily interpret the information. Its Triple Scan Principle offers advantages for measuring reflective surfaces and objects with indentations. The Blue Light Equalizer enables high-speed fringe projection and is so powerful that, on dimensionally challenging surfaces, short measuring times can be achieved.
The compact hand-held 3D scanner T-SCAN hawk is designed to capture data whenever needed. It includes technical features such as: photogrammetry of large objects, multiple laser sources and three scanning models. This makes it the perfect solution for fine detail. Thanks to the GOM Inspect onboard, the T-SCAN hawk offers a complete solution to simplify your entire workflow from scanning to evaluation and reporting.
The GOM ScanCobot, a mobile automated 3D scanning system, easily integrates with ATOS Q. With the high-precision quality of ATOS combined with an automated robotic arm, the GOM ScanCobot is cost-effective and easy to use. It improves efficiency in quality control of small to medium-sized parts, including plastics, fabricated metals and castings. The combination of the GOM ScanCobot and the proven ATOS performance results in fast fringe projection, data processing, high throughput and a design ideal for industrial use.

Related Content
-
Inline Inspection System for Wood Plastic Composites
Pixargus’ ProfilControl 7 DX WoodPlasticComposites measure all dimensions and geometrics, including deep grooves.
-
Upgraded CT Scanning and Multi-Sensor Coordinate Measuring Machines
Werth’s TomoScope S Plus 240 systems boast more than double the measuring volume as their predecessor with almost the same size.
-
Using a Melt Flow Indexer to Test Your Pressure Transducer
The MFI tester enables collection of meaningful pressure data in transducers in a relatively short time, providing realistic measures of the response time of a pressure transducer. This information is critical in the interpretation of pressure data measured in an extrusion process.


