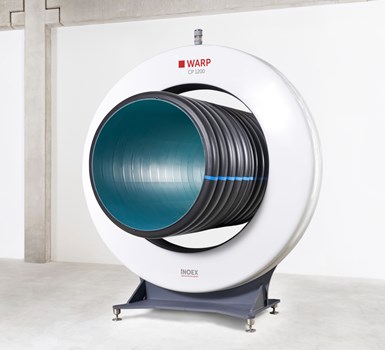
Radar-Based Wall-Thickness Sensor
Measurement units include an array of these sensors positioned around the circumference of the pipe, which can be placed in multiple locations on an extrusion line.
During October’s K 2022 show in Düsseldorf, Inoex introduced the WARP-CP measuring system with eight radar-based wall-thickness sensors for recording the various structures of a corrugated pipe. The outer and inner diam as well as the wall thicknesses of the bell, the crest, the liner and the valley can be resolved. No contact coupling medium is required to transmit and receive the radar waves, which makes the device very robust, reliable and independent of process fluctuations. The system is available for large corrugated pipes with diameters from 300 mm.
The sensors around the corrugated pipe scan it continuously. Since the corrugated tube has different structures, it is necessary to assign the measurement data to the corresponding position on or in the pipe. The WARP-CP algorithms do this automatically and prepare the data for the user in such a way that he is provided with different graphics and corresponding measurement data for each structure.

Photo: Inoex
For applications with the most stringent quality inspection requirements, Inoex’s WARP 100 units use more sensors to enable 100% measurement around the circumference of the pipe as well as the extrusion direction and can also detect eccentricity and ovality.
The specially developed optics allow the alignment of the radar wave to be focused on the center of the pipe. The sensors are arranged in such a way that the measuring spots overlap, thus ensuring close-meshed coverage in the extrusion direction. The maximum line speed for 100% coverage is up to 11.8 meters/min. Measured variables such as wall thickness, diameter, ovality, eccentricity and process conditions (e.g. sagging) are precisely recorded, documented and used for automatic process control.
Inoex also show a mobile, radar-based hand-held measuring device for wall- thickness measurement, specially designed for medium and large pipe extrusion as well as for sheet. Wall thicknesses from 2 to 110 mm (depending on the material) can be measured. Applications include a quick centering aid in the start-up process, final inspection of production or as a stock control device.
Not only can wall thicknesses at pipe ends be measured, but also the course inside a pipe section or a sheet. The measurement is carried out at the push of a button and the last 100 measured values including the measuring angle on the pipe as well as the time stamp are stored.
Related Content
-
Roll Cooling: Understand the Three Heat-Transfer Processes
Designing cooling rolls is complex, tedious and requires a lot of inputs. Getting it wrong may have a dramatic impact on productivity.
-
Use Interactive Production Scheduling to Improve Your Plant's Efficiencies
When evaluating ERP solutions, consider the power of interactive production scheduling to effectively plan and allocate primary and secondary equipment, materials and resources on the overall production capacity of the business and conclude that this is a key area that cannot be overlooked.
-
Medical Tubing: Use Simulation to Troubleshoot, Optimize Processing & Dies
Extrusion simulations can be useful in anticipating issues and running “what-if” scenarios to size extruders and design dies for extrusion projects. It should be used at early stages of any project to avoid trial and error and remaking tooling.


