Injection Molding: How to Set Second-Stage (Pack & Hold) Pressure
Most molders work with two parameters for establishing second-stage pressure. But within Scientific Molding there are actually four.
With Scientific Molding, two stages are used for forming the part: The first stage for getting most of the plastic into the part, normally 90% to 99.9% full by volume; and the second stage, to pack the part to replicate the steel cavity texture and shape. The second stage usually moves relatively little plastic in the cavity but it is critically important for surface finish, cosmetics, and part dimensions. Most molders work with two parameters for establishing the second stage—pressure and time. Within Scientific Molding we expand this to four factors:
1. Method of switchover from first to second stage.
2. Running the part with the gate sealed (frozen) or unsealed.
3. Hold time.
4. Pressure to pack the cavity properly.
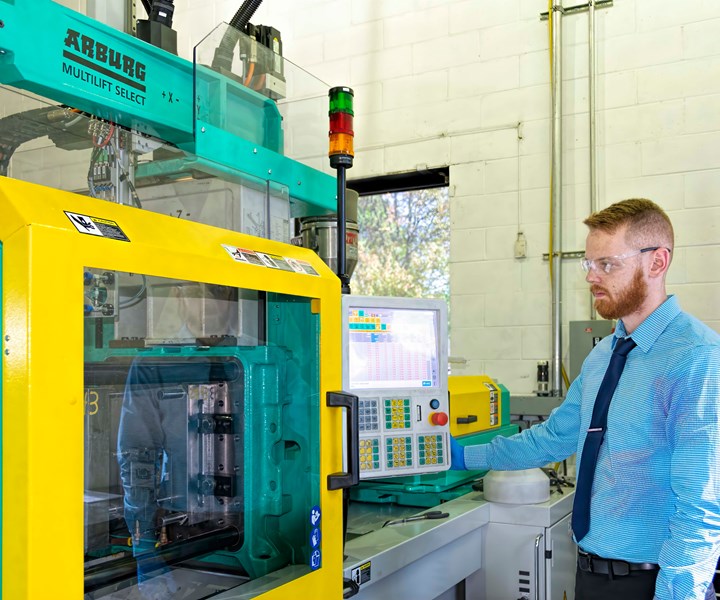
Controlling the switchover from first to second stage is perhaps the most critical element of a molding process. It can make or break your process for high-quality parts.
Switchover
Controlling the switchover from first to second stage is perhaps the most critical element of a molding process. It can make or break your process for high-quality parts and it is often the reason processors can not replicate parts from one machine to another. For most applications, switchover should be as short as possible, meaning a quick change from whatever pressure is at the end of first stage to the required pressure for second-stage pack and hold. You must know how the machine controller handles this switchover to set this up properly.
Transfer from first to second stage must be quick and consistent, so understanding how your press works is crucial to achieving the desired result.
Unfortunately how switchover is accomplished is not standardized across machines, so molders are faced with four possibilities: 1) The machine has a velocity-controlled switchover. 2) The machine controller has a velocity setpoint for switchover but it only can slow the ram during transfer, not control it. 3) The machine has no velocity setpoint for switchover. 4) The machine is not functioning properly and there is a gradual velocity slope, dip, or oscillation as it switches from first to second stage.
The bottom line is that transfer from first to second stage must be quick and consistent. So understanding how your press works is crucial to achieving the desired result. The time from the end of first stage to the second-stage pressure setpoin should be less than 0.10 sec for proper process control with most parts. You don’t want any dips, spikes, oscillations, or gradual slide into second-stage pressure. Dips may allow the flow front to hesitate, which may cause underpacking or shorts. Spikes or a gradual slide into second-stage pressure at switchover will overpack the cavity and may cause flash. Oscillations often cause poor process consistency. Process-monitor graphs of injection pressure vs. time are usually the best way to evaluate your machine’s response.
Gate Sealed or Unsealed?
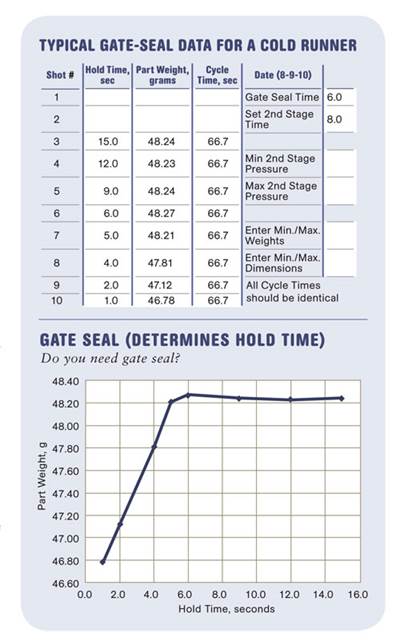
It is a myth that all parts should be run with gate seal. You must determine what is best for a particular part by running a gate-seal experiment and testing parts made with and without gate seal. There will be times where 100% of the parts will fail in performance testing when run with the gate frozen and 100% of the parts will pass when run with the gate unfrozen, or vice versa. It is not something I can deduce from simply looking at the part or process. Do the gate-seal experiment and test the parts to find the answer.
Setting Hold Time
Knowing whether the part should be run with the gate sealed or unsealed allows you to fix the length of time for the second stage. If gate-seal time is required, add a second or two to the gate-seal time for process robustness and stability. This does not have to add to cycle time, as most situations allow you to take this off the cooling time or mold-closed timer. If gate-unsealed is best for part performance, then start with half the time it takes to get the gate frozen. Picking the exact gate-seal time is the worst possible case due to normal temperature and process variations. Your parts will be made sometimes with and sometimes without gate seal. This will produce inconsistent parts. A corollary is that if your process runs without gate seal, cycle-time consistency becomes critical for consistent parts. If cycle time varies while running with gate unsealed, your parts will vary because you are changing the amount of polymer in the cavity. You can check this by weighing parts.
The right second-stage pressure centers the process within the range of part specifications to attain a good Cpk for your parts.
Setting Hold Pressure
Finding the correct hold pressure is critical for packing the part. The right second-stage pressure centers the process within the range of part specifications to attain a good Cpk for your parts. Since hold time is set from the gate-seal experiment, you should experiment to find the correct second-stage pack and hold pressure to center the part within its specification range.
First, check that the first stage is stable and that you have the expected short or sinky part at the end of the first stage. Do this by leaving time on the second stage and reducing hold pressure to as low as the machine allows—but do not take hold or pack time to zero. Is the first stage as expected? If not, fix the first stage. Nothing you can do in the second stage will compensate for a fouled-up first stage.
If the first stage is stable, start adding hold pressure. Start low, perhaps with only 1000 to 2000 psi plastic pressure. Check the parts with each increase in hold pressure; keep raising hold pressure in small increments until your best judgment indicates these parts might be acceptable. Make the quantity of parts that QC needs for preliminary testing. Label and set them aside.
Now continue to raise the hold pressure until you reach a point where you see unacceptable flash, pin push, sticking, or other mold or part issues that may cause damage or indicate the process cannot be run at this high pressure. Reduce the pressure to the maximum the process will allow for safe, efficient production. Again, make a set of parts for preliminary QC inspection. Label and set them aside. Finally make a set of parts in the middle of the low-to-high-pressure range just determined.
Take these three sets to quality control and let QC provide data as to which parts are unacceptable or acceptable. Only three answers are possible:
1. All parts are too big. This means trouble, because it suggests that the wrong shrinkage was used to calculate the cavity dimensions. Rarely will any process change bring part dimensions to the center of its specification range if they are out within this low/high pressure range.
2. All parts are too small. This is still not good news but at least we are “steel safe” and the mold can be adjusted to bring the part into specification. Again, it will be rare that a process change can bring the part to the center of its specification.
3. Some parts are too small and some are too large. You now have data to establish the low and high limits for your mini-DOE. Experiment with second-stage pressures within the “acceptable” part range to center your process at the center of the part’s specification range. This is th right track for good Cpk and six-sigma quality.
The rules of thumb about using 25%, 50%, or 75% of the injection pressure are myths with no data for support. This procedure will show that sometimes you need low hold pressures, while at other times you will need hold pressures that exceed the injection pressure. The only rule to live by is: Get data and let the part decide!
ABOUT THE AUTHOR: John Bozzelli is the founder of Injection Molding Solutions (Scientific Molding) in Midland, Mich., a provider of training and consulting services to injection molders, including LIMS/LSR and other specialties. Contact: john@scientificmolding.com.
CORRECTION
Your January article, “You Must Dry Hygroscopic Resins,” said, “To get rid of it [moisture] you have to dry these polymers at temperatures above the boiling point of water, 212 F.” But the [resin supplier’s] drying recommendation for ABS (Polylac 747) is 184-194 F.
--Ron Krippner, v.p. of sales
HK Plastics Engineering, Inc., Oceanside, CA
Author’s reply:
I should have advised drying some polymers above 212 F. They are correct on a 180 F drying temperature for ABS, which is a special case, because moisture does not break the polymer chains. Moisture in ABS just causes splay. Most other hygroscopic resins do need to be dried above the boiling point of water.
--John Bozzelli
Related Content
Bozzelli’s Guide To Specifying a Dryer
Here's a list of 17 things to do when looking for new drying equipment.
Read MoreA Guide to Ultrasonic Welding Controls
Ultrasonic welding today is a sophisticated process that offers numerous features for precise control. Choosing from among all these options can be daunting; but this guide will help you make sense of your control features so you can approach your next welding project with the confidence of getting good results.
Read MoreThe Importance of Barrel Heat and Melt Temperature
Barrel temperature may impact melting in the case of very small extruders running very slowly. Otherwise, melting is mainly the result of shear heating of the polymer.
Read MoreMedical Tubing: Use Simulation to Troubleshoot, Optimize Processing & Dies
Extrusion simulations can be useful in anticipating issues and running “what-if” scenarios to size extruders and design dies for extrusion projects. It should be used at early stages of any project to avoid trial and error and remaking tooling.
Read MoreRead Next
Injection Molding: Why & How to Do Gate-Seal Experiments
Part of optimizing any molding process is determining the second-stage injection, or pack and hold, parameters.
Read MoreMaking the Circular Economy a Reality
Driven by brand owner demands and new worldwide legislation, the entire supply chain is working toward the shift to circularity, with some evidence the circular economy has already begun.
Read MorePeople 4.0 – How to Get Buy-In from Your Staff for Industry 4.0 Systems
Implementing a production monitoring system as the foundation of a ‘smart factory’ is about integrating people with new technology as much as it is about integrating machines and computers. Here are tips from a company that has gone through the process.
Read More
.jpg;width=70;height=70;mode=crop)
