INJECTION MOLDING: Setting Mold Protection Takes Time But Saves More
Mold protection is often neglected, but it more than pays for the time and attention required.
I would wager good money that U.S. molders lose hundreds of thousands of dollars on mold damage and related costs every day. The photo below shows mold damage on the parting line. We used a pressure-sensitive film that changes the intensity of red relative to the amount of contact pressure. Note the blocks of red, showing contact points between the mold halves, separated by vents and corresponding dump channels. Notice the white area (meaning no pressure) inside one of the blocks of red on the right side. Note that the shape of the white area is the same shape as a cashew gate.
If you looked at this area of the mold, you’d see an indentation of the steel. In this case, the cashew gate broke off a molded part and, due to static electricity, stuck to the mold surface. Upon clamp-up for the next shot, mold protection did not sense this 0.030-in.-thick (0.76-mm) piece of plastic, and the 50 tons of clamp force wound up hobbing the steel. There is just enough area of the parting line intact to hold, or this part would have flash in this area on every part.
Despite issues like this, mold protection doesn’t get the attention warranted, most likely because it takes time to set up properly and isn’t as easy as it seems to execute. Each mold has its own particular requirements, and machine controllers handle mold protection in a number of ways. But it should be done daily if not once per shift.
How to Set Up Mold Protection
Since it is so dependent on the mold and machine combination, there is no one procedure that can be followed, so start with a goal or purpose and establish a strategy that suits your machine’s capability. Since some presses have better control of mold protection, you may want to ensure your delicate molds go only in those machines. The goal, of course, is to protect the mold from any obstruction, whether a part or delicate mold detail such as a horn pin, that prevents smooth mold closing. The strategy is more involved and has several steps:
1. Mount the mold using the appropriate number and types of clamps. Use hardened bolts and washers. Bolts should be threaded into the platen at least one bolt diameter. Torque to the appropriate setting if possible. Carefully install and harness or tie down your cooling lines to ensure movement does not cause wear.
2. With the machine in mold-safety mode, find the mold-open position that will allow parts and runner (if any) to drop or be removed by automation. Slowly close the mold. Listen and feel the machine for any unexpected noises and bumps. Many times I have set a mold only to find the moving side of it bumping the leader pins just as they mate. Adjust the mold halves if needed. Can part of the mold stick out beyond the platens? Not if any portion of the part(s) are beyond the platens.
3. Find the correct tonnage of clamp force this mold requires and set it appropriately; do not assume that full clamp force is needed. Too much clamp force—especially on small molds—damages both the mold and machine. According to SPE/SPI guidelines, the mold should occupy at least 70% of the distance between the tiebars. Use the minimum clamp force that makes acceptable parts. A general rule is you need 2–6 tons of clamp force/in.² of projected area of the parts and runner. Use the lower end for easier-flow resins and higher end for stiffer grades. Part geometry and nominal wall thickness also play role in the clamp force required.
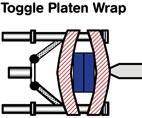
For example, thin-wall applications often need the higher end of available clamp force. Clamp force on most machines is developed by stretching the tiebars. They need to stretch evenly; check this annually. Part of protecting the mold is clamp-up parallelism. I am not a fan of using a bluing agent to see if the parting line mates evenly; it will transfer if you have 1 lb or 5000 lb of touch force. There are better ways of measuring actual parting-line mating force.
Start decelerating well before you get to the mold detail that is of concern upon mold closing.
4. Program the mold closing and opening sequence. Start mold closed at a reasonable velocity and pressure to accelerate the mold but not have the machine jump. Then go to an acceptable fast-close speed. Start decelerating by going to a slower velocity before you get to the mold detail that is of concern upon mold closing (it could be a horn pin, slide or the thickness of the part). You do not want to crush the part due to momentum, and I do not agree that if you have a sensitive slide at 1.5 in. (38 mm) that you start mold protection at 1.5 in. You have to start earlier. The mass of the mold and platen of the moving side is significant; you have to dissipate the kinetic energy (momentum) so mold protection can work if needed. I have seen some electric machines operating at high closing speeds stop so fast that a white foam cup does not crush by more than 0.25 in. (6.5 mm). If you need to slow your machine down to ensure low pressure is working, do so.
Set mold protection to be on during the entire mold-closing cycle if you have a machine that can monitor the entire stroke and will stop and alarm is anything is out of a normal band. Otherwise, set mold protection to start a little before the moving side touches a delicate mold detail, horn pin, slide, or possible obstruction.
5. Move the platen at this safe speed and low pressure until the moving side of the mold is about to kiss on the “A” (or stationary) side. Choose a position to trigger clamp tonnage that is as tight to mold kiss as possible. There should be no banging as the mold sides mate. Start with a low pressure that will not close the mold and increase it until you get clamp pressure. This should show the minimum pressure needed to trigger clamp-up. If the mold will not close after a period of running, remember that tools warm up and grow, so recheck your trigger position and adjust as necessary. Some machines “auto adjust” as they sense the tonnage increase as the mold warms up. If the mold requires high pressure to close, check out the mold on the bench. It should close and open easily.
6. Check that mold protection is functioning properly by stacking foamed cups to the height of the mold detail you want to protect. Some molders instead use a cardboard box. You can tape these into position. Then operate the mold under actual production speeds and see if the machine senses this obstruction and stops safely. If they crunch a little bit, that’s OK. But if they come out flat as a pancake, you do not have the mold protection needed.
7. If you are running a mold at temperatures above 200 F (95 C), you may get an alarm on mold closing after running for an hour or so. You can find nothing on the parting line preventing clamping up, but it just will not go into high clamp tonnage. Do not increase the mold-protection pressure. Take the insulator boards off the clamping plate. Put them between the mold and the clamping plate and gun drill the clamping plate for cooling lines. Cool the clamping plate so the heat does not migrate into the platens. Heat migration causes the platens to expand. This, in turn, Y’s out the tiebars, and it is these widened tiebars preventing the mold from closing under normal mold protection pressure.
Related Content
What to Look for in High-Speed Automation for Pipette Production
Automation is a must-have for molders of pipettes. Make sure your supplier provides assurances of throughput and output, manpower utilization, floor space consumption and payback period.
Read MoreBack to Basics on Mold Venting (Part 1)
Here’s what you need to know to improve the quality of your parts and to protect your molds.
Read MoreHot Runners: How to Maintain Heaters, Thermocouples, and Controls
I conclude this three-part examination of real-world problems and solutions involving hot runners by focusing on heaters, thermocouples, and controls. Part 3 of 3.
Read MoreGot Streaks or Black Specs? Here’s How to Find and Fix Them
Determining the source of streaking or contamination in your molded parts is a critical step in perfecting your purging procedures ultimately saving you time and money.
Read MoreRead Next
How to Solve Uneven Clamping
Of the hundreds of variables involved in injection molding, clamping mechanisms and platens often get less attention than they deserve.
Read MoreNew Mold Monitoring System Promises Fast Processing Speeds and High Resolution
The full-color, high-resolution digital image processing technology serves to protect complex, expensive injection molds running sub 2-second cycles.
Read MoreSee Recyclers Close the Loop on Trade Show Production Scrap at NPE2024
A collaboration between show organizer PLASTICS, recycler CPR and size reduction experts WEIMA and Conair recovered and recycled all production scrap at NPE2024.
Read More
.jpg;width=70;height=70;mode=crop)
