Solving Issues with Gloss
Your problem may be related to tooling, material, processing, or combinations thereof. Here’s how to find the root cause.
Gloss specks, glossy spots, or inconsistent gloss on molded parts can be influenced by tool or part design. I’m not approaching those defects here in the role of a scientist or professor, but to share my experiences from the trenches.
Let’s start with the overall gloss of the part because it is the easiest one to address. There are a few things you can do with the process and material if you are having an issue with the whole part being out of the gloss spec, but beyond that you are looking at modifying the surface finish of the cavity steel.
On the processing side, you a have a few options that can affect gloss with cavity water temperatures, pack/hold pressures, fill speeds, and material temperatures. In most cases these do not have a big impact and can reduce your overall process window, making it less robust to address other issues. So it is best to find the most robust process for the part and focus on the cavity surface finish for the gloss solution. But whether you process around the gloss issue or not, it is important to understand how and why it impacts the gloss level.
In processing around a gloss issue you are not changing the cavity steel surface finish. Instead, you are making changes to process parameters to make the part shinier or duller. A cooler mold, cooler melt, lower pack/hold pressure, and slower fill speeds will tend to make your plastic part glossier. This occurs because the plastic is not forming to the micro details of the cavity steel surface finish because it is cooler and less pressure is being applied. And the opposite—hotter mold and melt, higher pack/hold pressure, and faster fill—will tend to make your part duller. This is because the higher mold temps prevent the plastic from skinning up as quickly. Melt temps do not have as much of an impact as fill speed, because velocity and resulting shear have a much greater impact on the viscosity of the material.
Keep in mind that each material will provide a different level of gloss. It is also important to understand that the color of your cavity steel will not influence whether the part looks dull or shiny. The same goes with your plastic part. It’s just how the surface of the steel or plastic reflects light that changes the gloss and can make it appear to be a different color.
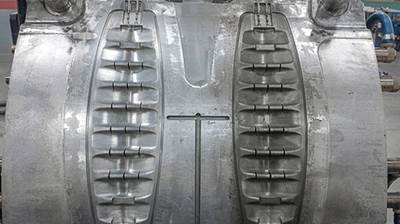
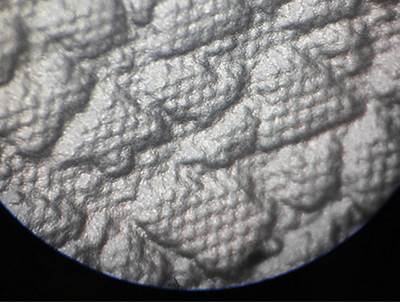
If your cavity has a smooth-polished surface and your part is too dull, it’s logical to start with applying a higher level of polish to the steel. But if the cavity steel has been polished as high as possible and the part is still not at the gloss needed, processing or material changes will be necessary. On the other hand, if your part is too shiny, your cavity surface finish needs more surface area via a rougher polish or media blasting. Both of these create more surface area on the steel with peaks and valleys, which will absorb more light and make your part duller.
Inconsistent texture geometry and depth can also be a contributor to gloss issues. I get into this in a little more detail with surface geometry and blast media in another column (see Apr. ’15; short.ptonline.com/texture).
Another gloss issue I have seen many times involves the part design, specifically variations in wall stock or abrupt wall-stock changes. When the wall stock varies, it is very difficult to maintain consistent gloss on the part. Depending on the flow pattern, thinner wall sections may not be exposed to as much plastic pressure, and the result is excess gloss in that area. The same effect can happen when the wall stock becomes too thick; you can get glossy spots because of shrinkage and not being able to pack it out. Gate location can have an impact in adjusting for wall thickness, but whenever you have varying wall stock you are at risk for inconsistent gloss. Inadequate venting can also create inconsistent gloss. Depending on the material and process, lack of venting can cause dull and/or shiny spots. Venting is often overlooked; rarely have I seen a tool that I would consider to have adequate venting and enough parting-line bearing surface to protect the vents from coining shut.
In one recent case, I myself overlooked venting as a potential solution to a gloss problem. I had a situation with some glossy streaks showing up on the part. I assumed the issue was related to the varying wall stock and how the material was flowing together and not being near the parting line. Others on my team thought venting was the problem. Venting is simple to prove out—I temporarily taped the parting line to hold it open—and the results proved my colleagues right and my assumption wrong.
Lack of cooling can also contribute to gloss issues when cavity details or mold components become hotter than the rest of the cavity. Typically in these cases the gloss or read-through will show up shinier.
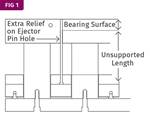
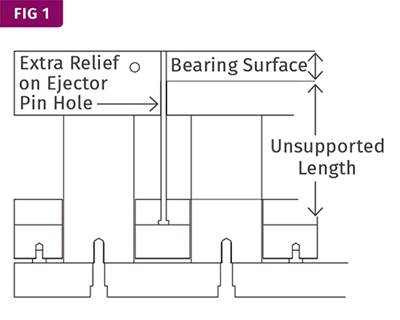
On the other hand, if you have a read-through or gloss issue in an area that is duller than the rest of the part, and that area is situated across from a tooling component such as a core pin or lifter, look into deflection of that component. This is often overlooked as a possible root cause of gloss issues but should be considered, especially when there is decent amount of cavity surface area on the component. With ejector pins and lifters that have too much unsupported length and cavity surface area, the plastic pressure can deflect the component.
The force of deflection on the component will apply pressure against the part and can create a dull appearance. This can be difficult to diagnose if the deflection is minimal, but there are situations where you can obviously see the effect on the plastic part of the component being out of position. If the area is too shiny, I first look at temperature of the component; the first shots should not show the defect if temperature is the issue. If the area is dull opposite a component, I look into deflection, but it is not always the root cause (see Feb. ’15 column; short.ptonline.com/ejectors).
Buildup can also cause gloss issues and is typically easy to diagnose. Lack of venting, converging material flow fronts, and cheaper grades of materials can be contributors. In cases where the buildup issue cannot be resolved, coatings can be applied to reduce the buildup and make it easier to clean without affecting the cavity gloss (see Mar. ’15 column; short.ptonline.com/buildup).
Materials that contain abrasive additives such as glass fibers can cause gloss issues over time with erosion of the cavity surface. On textured cavities, this will result in a glossier finish as the texture detail is eroded over time. Hardened steel or hard coatings will reduce this issue and prolong the time between maintenance tasks, but with high-volume tools and high percentages of fillers, these tools will still need to be refurbished.
ABOUT THE AUTHOR
Randy Kerkstra has worked in the plastics industry for more than 30 years, specializing in troubleshooting injection molding. His mold experience includes 14 years in the tool shop environment as a mold maker/designer and more than 15 years maintaining, repairing, and troubleshooting thousands of molds. Research areas have included gate geometry, runner/sprue waste and reducing part defects with a focus on the mold and how it impacts these issues. He currently works in sales and product development for PCS Company.
Related Content
Got Streaks or Black Specs? Here’s How to Find and Fix Them
Determining the source of streaking or contamination in your molded parts is a critical step in perfecting your purging procedures ultimately saving you time and money.
Read MoreThe Effects of Stress on Polymers
Previously we have discussed the effects of temperature and time on the long-term behavior of polymers. Now let's take a look at stress.
Read MoreBack to Basics on Mold Venting (Part 1)
Here’s what you need to know to improve the quality of your parts and to protect your molds.
Read MoreThe Effects of Time on Polymers
Last month we briefly discussed the influence of temperature on the mechanical properties of polymers and reviewed some of the structural considerations that govern these effects.
Read MoreRead Next
TOOLING: What You Can Do About Mold Buildup
It depends on the materials and additives you use, and the kinds of mold detail, but adequate venting, not overheating the material, and mold coatings are your best defenses.
Read MoreTOOLING: Ejectors: Watch That ‘Unsupported Length’
It may be an unfamiliar term, but it’s the key to preventing ejector-pin deflection and breakage
Read MoreTOOLING: Clearing Up the Mysteries Of Mold Texture
It’s a subject not widely understood by molders and it affects more than just part appearance.
Read More

