TOOLING: Clearing Up the Mysteries Of Mold Texture
It’s a subject not widely understood by molders and it affects more than just part appearance.
In this column I would like to discuss texture and how it affects gloss on a micro level. Gloss levels and texture geometry can affect not only part cosmetics but sticking in the mold and visual defects. I have found the subject of texture to be poorly understood in the industry at large, apart from specialists at mold-texture houses. Each plastic material also has different gloss, so what works for one material may not work for another. So let’s start with the basics.
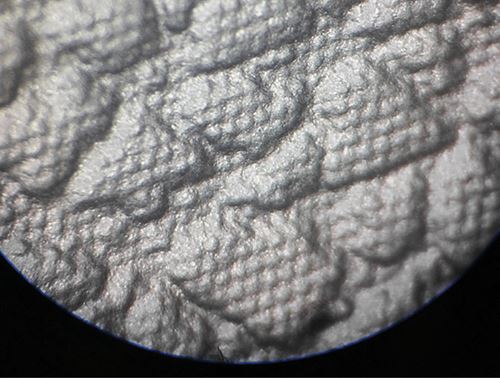
What, exactly, on a microscopic level, affects gloss on the plastic part? It comes down to the geometry and depth of the texture and the surface finish of the steel texture itself via polishing or blast media. To understand exactly how this works we will need to go under the microscope where the naked eye cannot see.
Above, I mentioned two things that affect the gloss: the geometry and surface finish. Remember, we are molding the plastic to the steel so the color of the tool steel has absolutely nothing to do with gloss. The steel can appear to have a different color when polished or roughed up but it’s the surface finish and how it reflects light that changes the color appearance.
Just think of a lake on a very quiet, calm day and how the sun reflects on the calm water. It can produce a glare that burns the eye. Now, on another sunny day but with light breeze causing soft ripples, you can still get a reflection but the ripples distort it. Now let’s move to a sunny day with a brisk wind causing waves—the sunlight is even more distorted. Two things are happening: First, think of the water as the texture in a mold; the flatter and smoother it is, the glossier the part it will produce; and the deeper the texture (waves), the duller the part it will produce. The other thing that is happening is when the texture is deeper you are creating more surface area with the peaks and valleys in the same amount of the 2D profile area of the part.
Textures have come a very long way the past decade or so and have some very complex geometries. The depth, patterns, and crispness (sharpness of the peaks and valleys of the texture geometry) have a big impact on part gloss. There is also a process some of you will be familiar with called micro-etching, which breaks up the geometry of the texture to make a duller part. This is just putting waves on the smooth water to reflect/distort the light.
TEXTURING THE TEXTURE
Now let’s consider the geometry of the surface finish on the texture itself. We are getting down to the micro level, but the surface finish of the texture geometry is just another level of texture with flat and smooth versus peaks and valleys. This is where blast media or polishing come into the picture. The two main blast media used in the industry to adjust gloss are aluminum oxide and glass beads. Silica sand and other media are also used.
After a cavity is acid etched to create the texture, blast media are used to clean up the surface and achieve a desired gloss level that will achieve the specified gloss for the plastic part. Aluminum oxide (AO) is an abrasive mineral with sharp edges, creating peaks and valleys on the surface finish of the texture geometry, which will produce a duller finish on the plastic part. There are numerous particle sizes of AO (called grit size) that impact the depth of the peaks and valleys produced by blasting. (Results also depend in part on air pressure and the distance from the cavity of the blast media, but I will not get into the technical details of the process—that’s a different topic.)
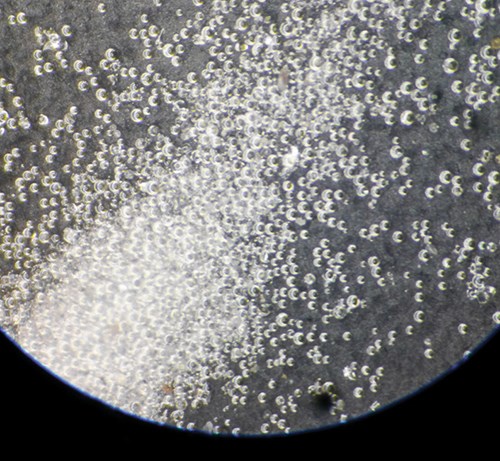
Glass beads (GB) are round and smooth like a marble, which will produce a smoother finish on the texture and a glossier part. So the AO surface finish on the texture will provide the dullest gloss on the plastic part and GB surface finish on the texture will provide the highest gloss with media blasting. What’s more, you can combine the two media at different ratios to achieve any gloss between the lowest and highest gloss they can produce alone.
For example, to achieve a mid-range gloss you will need a ratio of 1 part AO and 2 parts GB. Some may wonder why a 1:1 ratio would not achieve the mid-range gloss. That’s because AO has a bigger impact on the surface finish than the GB. I have used blend ratios that go from a 1:1 to 12:1 to achieve different levels of gloss. But typically I try to use either AO or GB alone or a 1:2 ratio for low, medium, and high gloss. When the gloss is critical and cannot be achieved with these three choices, I will go with a custom ratio.
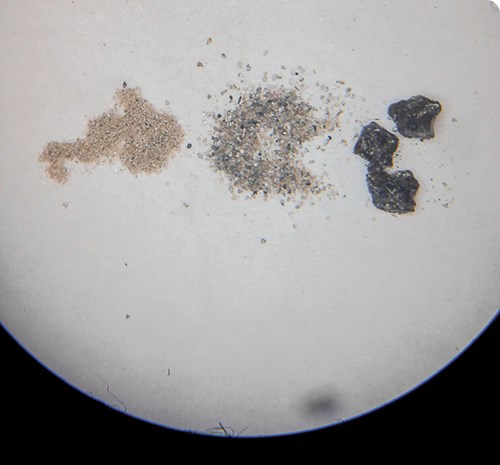
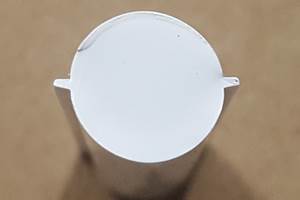
I use 320 grit AO 90% of the time, whether alone or in a blend. In the accompanying pictures, you can see that that 320 grit has the consistency of flour and will not eat away at the cavity details and parting-line edges as much as larger AO paticles (smaller grit number) and will produce a low gloss. I rarely use 220, 180, and 120 grit sizes; they can drop the gloss lower (but not significantly) and they risk eroding the texture if blasting occurs frequently. If you were to use something as extreme as 24 grit you would damage the parting-line edges and texture geometry instantly. There is a 400 grit AO on the market, but it will clump up with humidity.
With GB, I use the finest bead I can purchase, again about the consistency of flour. This also allows you to get into the finest details of the texture geometry, unlike a larger bead.
If the desired part gloss cannot be achieved with blast media, you will need to use other methods. If you need it duller, micro acid etching is an option. I have also used 54 grit AO to alter the surface like micro etching, but this is not recommended unless you are very experienced with surface finishes and can protect the parting lines in the blasting process.
If your desired gloss needs to be higher than what GB can produce, you will need to smooth out the surface of the texture by wire brushing or polishing. Wire brushing by hand will slightly increase the gloss; it is a very simple process that does not require a high level of skill. But using power tools requires a professional, as you can destroy the texture and parting lines. I have also used brushes and diamond compound to polish the surface and get into fine details. After polishing, if the gloss is too high you can blast with GB to drop the gloss but it will be higher than when originally blasted with GB.
Related Content
Why Shoulder Bolts Are Too Important to Ignore (Part 1)
These humble but essential fasteners used in injection molds are known by various names and used for a number of purposes.
Read MoreWhy Shoulder Bolts Are Too Important to Ignore (Part 2)
Follow these tips and tricks for a better design.
Read MoreWhere and How to Vent Injection Molds: Part 3
Questioning several “rules of thumb” about venting injection molds.
Read MoreHow To Design Three-Plate Molds – Part 4
There are many things to consider, and paying attention to the details can help avoid machine downtime and higher maintenance costs — and keep the customer happy.
Read MoreRead Next
People 4.0 – How to Get Buy-In from Your Staff for Industry 4.0 Systems
Implementing a production monitoring system as the foundation of a ‘smart factory’ is about integrating people with new technology as much as it is about integrating machines and computers. Here are tips from a company that has gone through the process.
Read MoreFor PLASTICS' CEO Seaholm, NPE to Shine Light on Sustainability Successes
With advocacy, communication and sustainability as three main pillars, Seaholm leads a trade association to NPE that ‘is more active today than we have ever been.’
Read More
