Tooling: Why Ejector Pins Break and How to Prevent It, Part 3
Here we focus on forces, friction, surface finish, and lubrication.
In addition to the potential causes for ejector-pin breakage discussed in the first two parts of this series (in August and September), there are two other common reasons: (1) the force required to eject the part from the core exceeding the strength of the pin; and (2) galling.
The force required to start the ejector pins moving forward is controlled by static friction plus the adhesion of the part to the core. Static frictional forces are usually higher than kinetic frictional forces, which are the forces required to keep the pins moving once they’ve started. To minimize the initial shock to both the pins and the parts, the ejection velocity should start off relatively slow. After about 1/8 in. or so of travel, it can then ramp up to the desired ejection speed.
Various factors can cause an ejector pin to collapse.
The best way to minimize ejector-pin failure because of excessive force is to use the largest-diameter ejector pins possible and a sufficient quantity of them. Unfortunately, ejector pins can limit your ability to locate cooling channels ideally, so a compromise often must be made. Regardless, nothing increases the amount of force required to remove a part from a core more than an overpacked condition—especially if there is a lot of vertical surface area machined into the core, such as thin, deep ribs. The force required to eject the part can become more than the strength of the plastic itself, and the ejector pins will push right through the part. Note: Large-diameter pins are beneficial when trying to eject both very thin and very thick-walled parts. A small pin can indent, pierce or leave a stress mark on a weak, thin-walled part. It can do the same thing to thick-walled parts, which are often very hot and soft in the center upon ejection. In both cases, the cycle times are increased simply because the ejector pins are too small.
If your molding machine allows you to limit the amount of ejector force acting on the ejector plate, it is a good idea to set a value somewhat greater than what is required to eject the parts under normal operating conditions.
Limiting the amount of ejector force can save you a lot of time and money in the event there is an issue with an ejector pin, such as binding or breaking. It can interrupt the molding cycle and prevent further damage. If the ejection-force value can be tied into an alarm on your machine, the same as you might do with the overall cycle time or screw-recovery time, all the better. If the force value is not monitorable, perhaps theejection time is—which will be almost as effective. Maybe someday a flow-analysis software program will be able to calculate the force required to eject a molded part, so we can precisely determine the size and quantity of ejector pins to use.
Given the endless list of variables, such as part geometry, material characteristics, draft angles, surface finish, pack pressures, mold temperature, gate location, undercuts, etc., I doubt we will see such a program anytime soon. However, Torsten Kruse, president of Kruse Analysis Inc. and an industry expert on plastic flow analysis, notes that “some CAE software programs can give mold designers insight as to where to place ejector pins based on calculating a part’s differential shrinkage and associated internal forces. Ejector pins can break due to differential part shrinkage requiring different or unequal amounts of force on different ejector pins.”
Based on Kruse’s statement, every ejector pin will probably require different amounts of force to eject a part. For example, the pins near the gate, near an inside corner, or at the bottom of a deep rib will most likely require more force than the pins on the runner or at the end of fill. This should be taken into consideration when deciding the ejector-pin locations, sizes and quantity.
For more on this subject, there is a 2001 SPE ANTEC paper entitled “Friction Properties of Thermoplastics in Injection Molding,” written by Ferreira, Nerves, Muschalle and Pouzada of the University of Minho in Braga, Portugal. It’s an interesting read for both mold designers and processors.
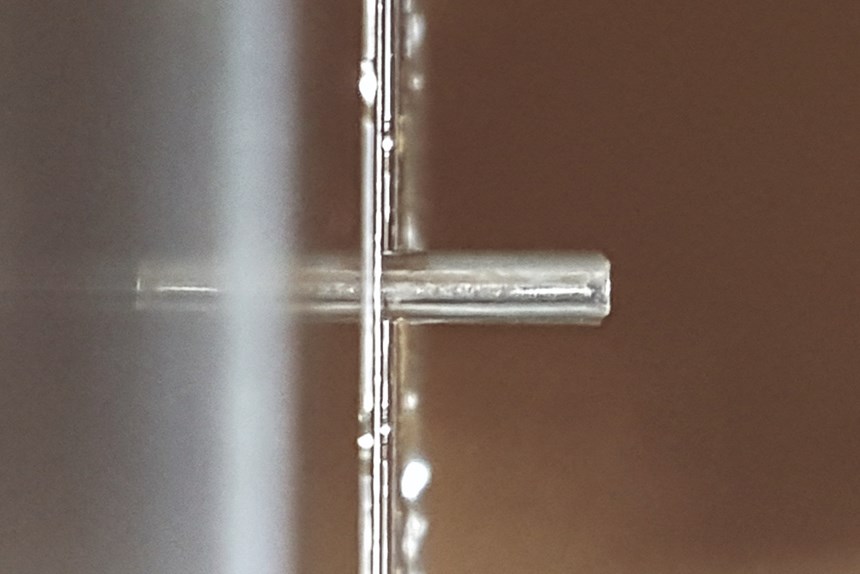
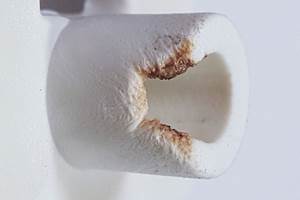
Next, galling is a form of wear caused by adhesion and friction when two metals slide against each other. The condition is exacerbated if there is a side load compressing the two surfaces—like when an ejector pin is not perfectly aligned with the through hole in the core. It puts more pressure on one side of the hole then the other. Unless an ejector pin is keyed for a specific orientation, you should be able to freely rotate it when the ejector plates are fully forward. This confirms that the centerlines of the pins are parallel, that they align with the through holes in the core, and that there is sufficient clearance around the shafts and heads of the pins.
The adhesional aspect of galling causes the material’s crystalline structure to slip and tear—depositing, if not welding, microscopic particles on the adjacent surface. Unlike other forms of wear, galling happens quickly. So, if you hear an ejector pin squeal—stop. It’s not going to get any better if you continue to cycle the ejector.
The frictional aspect of galling is relative to the mating material’s type and hardness. This is the same reason you try to use different types of steel and at least a 10-point Rockwell hardness differential on sliding or angled shutoff surfaces. The hardness differential is the predominant factor. The harder the steel, or at least the surface of the steel, the less it is prone to galling. If you can score lines on the side of an ejector pin with a hand file, which in my experience is not that uncommon for molds built in some Asian countries, you probably shouldn’t wait to see if it is going to seize up. Just accept the fact that it eventually will and replace it now.
Certain metals are prone to galling due to their atomic structure, especially those with high coefficients of friction, such as aluminum, titanium and, to some degree, stainless steel. Conversely, alloys such as brass or bronze are very resistant to galling, even though they are much softer.
Over the years, several mold-component suppliers have offered ejector pins made of various materials such as H-13, M-2, 420 stainless and copper alloys. Nitrided H-13 pins, or pins with hard surface coatings, are some of the best for reducing the possibility of galling, because their surface hardness is 65 to 74 Rockwell C.
Stainless-steel pins, and pins with thin chrome coatings, are well suited for medical, food-contact, and other applications where traces of grease or oxidation can contaminate the parts. The thin chrome-plated pins are not suitable for extremely high temperatures or corrosive molding materials such as rigid PVC.
I have some experience with stainless-steel ejector pins—none of it good, due to their propensity to gall. While many molders use core pins made of copper alloys, there are many benefits of using them for ejector pins as well. They have terrific heat-transfer properties and are very resistant to galling. Unfortunately, price isn’t one of their benefits. When selecting what type of ejector pins to use, also consider what will wear out, abrade, or corrode first—the pin or the core. Replacing a worn or eroded ejector pin is a lot cheaper than repairing a worn through hole in a core.
Unlike other forms of wear, galling happens quickly.
Preventive maintenance on ejector pins is at least as important as maintenance on the cavities and cores. After all, ejector pins also function to some degree as vents. They need to be routinely cleaned, lubricated and, depending on the molding material, neutralized. It doesn't take long for corrosive gases to tear pins up, which accelerates wear and increases the chances of their galling or breaking.
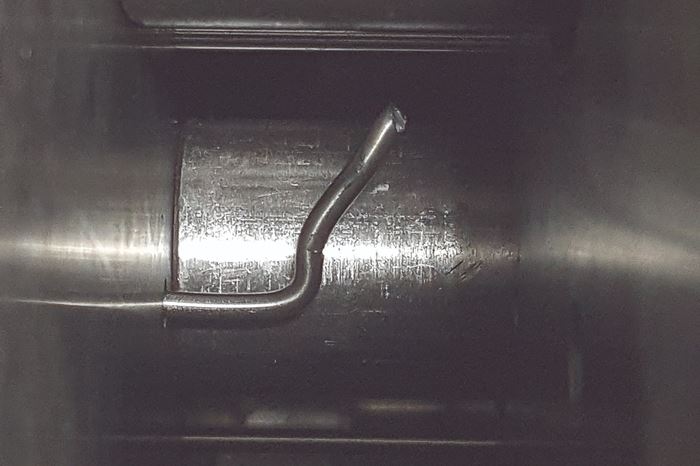
A seized pin caused by galling is a real problem for molders. If you’re lucky and the pin is fairly large in diameter, the ejector plates may not fully extend or retract, which should cause the machine to stop and go into alarm. That’s assuming you tie in the ejector plate to the molding-machine control. If you’re not lucky and the pin is fairly small in diameter, the pin will usually buckle and break within the ejector housing. This will allow the ejector plates to fully extend and retract—leaving a portion of the broken pin protruding beyond the parting line. If the low-pressure-close safety was set correctly, you might not have too much damage to the cavity when the mold closes again during the next automatic cycle. If the machine goes into alarm, a lack of training, experience, or keen grasp of the obvious might cause someone to overlook the protruding pin and further damage the cavity by increasing the low-pressure-close setting, or worse, go into manual mode and close the mold under high pressure.
High-speed ejection and retraction velocities increase the risk of galling due to an increase in frictional heat. Multiple ejection pulses and excessive ejector-stroke lengths obviously don’t help.
To be on the safe side, some processors always use one additional ejector pulse than is required to eject the part. I have never agreed with that approach. To me, it’s like robbing Peter to pay Paul. If there’s a problem with the part not ejecting properly, fix it.
The chance of galling can be greatly reduced with proper lubrication. In fact, the coefficient of friction for a lubricated surface is four times lower than for a dry surface. Mold-component suppliers offer pins with various types of lubricous coatings, such as thin dense chrome, molybdenum disulfide, DLC (Diamond-Like Carbon), tungsten disulfide (WS2), titanium nitride (TiN), black oxide, and Dicronite dry lube. Tungsten-disulfide-coated pins are not recommended for clear or light-colored parts, as they can cause discoloration. I have seen this several times with PC medical parts. In addition to their lubricious characteristics, some of these coatings also have the benefit of being extremely hard.
Suppliers of the DLC coating claim that the pins do not require any lubrication at all, which is ideal for medical and food-contact applications. Some of these coatings can withstand high temperatures, others can’t. So, choose the coating that best suits your application. The chance of galling can also be reduced for any type of pin or coating by ensuring there is proper cooling in the core, because when metal gets hot, it expands.
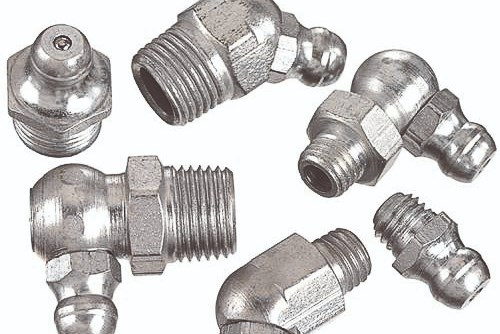
Ejector-plate guide bushings are also no strangers to galling. Some bushings have internal grease grooves, and an external annular depression. There is a small through hole in the side of the bushing connecting these two features. The purpose of this hole is to allow grease to be pumped into the bushing while the mold is still in the press. A grease gun attaches to a Zerk fitting, which is counter-bored in the edge of the ejector plate. The grease flows down a drilled hole or channel leading up to the outer diameter of the guide bushing. The bushing does not need to be keyed or oriented for the grease to travel into the internal grease grooves.
What’s a Zerk fitting? Oskar Zerkowitz immigrated to the U.S. from Austria and changed his name to Oscar Ulysses Zerk. He has more than 300 patents, one of which was a grease fitting known as “The Zerk.” At the time of his death in 1968, it was estimated that 20 billion of these fittings had been manufactured. That was 50 years ago. I wonder what that number is up to today. But to give credit where credit is due, it was Arthur Gulborg at the Alemite Die Casting Co. who invented the first hollow grease fitting with a spring-loaded ball in 1916. In 1924, Alemite purchased the Allyne-Zerk Co. and continued to manufacture both grease-fitting versions. In 1933, Joe Bystricky invented a modified version that is basically the style still used today. For whatever reason, Oscar Zerk’s name remains associated with this unique device.
Several mold-supply companies offer self-lubricated guide bushings, which are plugged with graphite. Graphite is an allotropic form of carbon. As the ejector plates move, traces of the graphite cover the surface of the guide pin. These bushings work well, particularly in medical or food-contact applications where external lubricants are prohibited. But if the molding material produces any corrosive outgasses, the longevity of these self-lubricated bushings can be compromised.
And if the bushings are ever lubricated with grease or oil—out of sheer habit—their longevity will also quickly diminish. Just make sure to use the appropriate diameter and quantity of guided ejector bushings—self-lubricating or not—to support the weight of the ejector plates. If the ejection stroke is very long, it’s often wise to have the guide pins extend into the opposing plate, so they are supported on both ends, instead of being cantilevered from just one end.
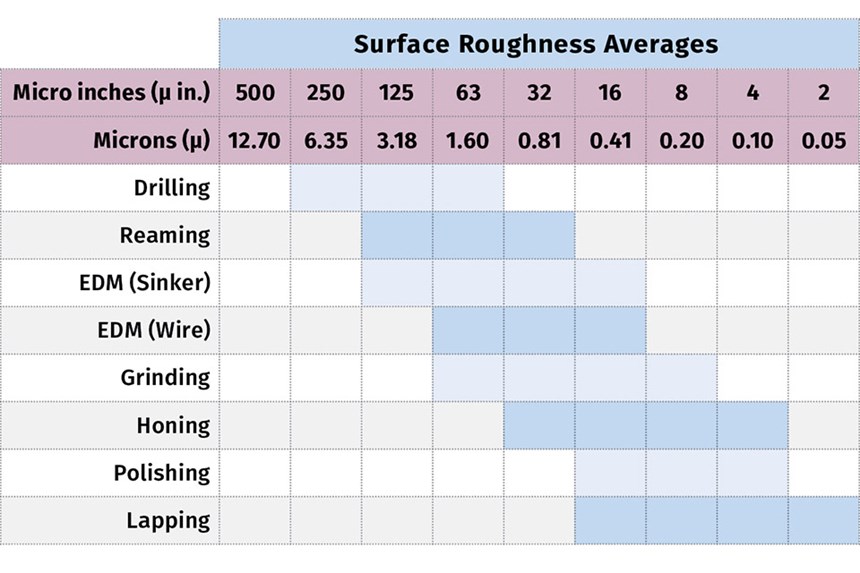
It makes sense that two components rubbing against each other will have less friction if their surfaces are smooth rather than rough. Depending on the manufacturer and type of ejector pin, the surface finish can be as low as 2 microin., or as high as 0 micro-in. Even the latter is more than adequate for most molding applications, although if you’re running over a million cycles a year, a finer finish may help extend your preventive-maintenance interval.
The most common method of installing a through hole in a core for an ejector pin is to drill and then ream the hole. The surface finish of a reamed hole will usually suffice for most molds. Back in the day, many tool shops honed or barrel lapped the holes after reaming for a more precise size and a finer surface finish. A honing stone rotates in the bore as well as moves in and out. This leaves a cross-hatched pattern to help retain a fine film of lubricant.
Galling can be greatly reduced with proper lubrication.
Today, when the size or surface finish must be finer than a reamed hole, jig grinding or wire EDM are typically used. Both methods have excellent position, diameter and circular accuracies down to a couple of tenths of an inch. That’s important when having to install a pin close to the edge of a side wall, or precisely in the center of a thin rib. I recommend using either of these two methods when there is a large quantity of small ejector pins in a mold, simply because the laws of probability predict at least one of them will cause a problem.
There is a slight advantage to the wire-EDM method: It leaves very fine peaks and valleys, parallel to the central axis of the ejector pin. These peaks and valleys help retain lubricants, as well as reduce the surface contact area on the ejector pin, which in turn reduces the frictional heat. Wire EDM costs more than reaming a hole. To help reduce that cost, predrill the hole about 0.002 in. to 0.004 in. smaller than the desired final size. Then the wire EDM only has to make a precision skim cut or two. The table on p. 39 shows the range of average roughness values for various types of machining operations. Depending on a number of factors, each range could be coarser or finer than those listed in the table.
ABOUT THE AUTHOR: Jim Fattori is a third-generation injection molder with more than 40 years of molding experience. He is the founder of Injection Mold Consulting LLC, and is also a project engineer for a large, multi-plant molder in New Jersey. Contact jim@injectionmoldconsulting.com; injectionmoldconsulting.com.
Related Content
Fundamentals of Polyethylene – Part 6: PE Performance
Don’t assume you know everything there is to know about PE because it’s been around so long. Here is yet another example of how the performance of PE is influenced by molecular weight and density.
Read MoreWhy Shoulder Bolts Are Too Important to Ignore (Part 1)
These humble but essential fasteners used in injection molds are known by various names and used for a number of purposes.
Read MoreBack to Basics on Mold Venting (Part 1)
Here’s what you need to know to improve the quality of your parts and to protect your molds.
Read MoreWhere and How to Vent Injection Molds: Part 3
Questioning several “rules of thumb” about venting injection molds.
Read MoreRead Next
Tooling: Why Ejector Pins Break And How to Prevent It, Part 2
Here’s the when and how to reduce the unsupported length of pins.
Read MoreTooling: Why Ejector Pins Break...and How to Prevent It, Part 1
In part one of this four-part series, we focus on the molding machine and the ejection system as culprits.
Read MoreMaking the Circular Economy a Reality
Driven by brand owner demands and new worldwide legislation, the entire supply chain is working toward the shift to circularity, with some evidence the circular economy has already begun.
Read More

